Autopilot is a combination of technologies that allow enrolled devices to be configured to a desired state. One prerequisite of using Autopilot is that devices must be enrolled prior to any device builds occurring.
There are a few ways to ensure devices are enrolled… This guide covers Vendor/Partner enrolment, which is by far the easiest method for you as a customer… but also, the one you’re least likely to be able to leverage unless you’re working with a partner/cloud service provider (CSP).
The other approach discussed utilises a Microsoft script to enrol the device into the tenant on the fly. This is my favourite process when dealing with test devices, or small numbers, and whilst it’s a little bit fiddly, it saves the hassle of having to export the Hash to a CSV, copying it to a USB stick, and then uploading it elsewhere. Other methods of enrolment exist, but these are not covered here as they are not deemed efficient.
Vendor/Partner Enrolment
Purchasing devices from a supported Vendor/Partner allows you to request that devices are enrolled, into your tenant before they arrive with your users, into your stock, or with your IT Department.
Vendors/Partners can enrol equipment via methods not available to customers (it’s much easier for them!). It is worthwhile establishing if this method can be of use to you.
You as the customer need to establish a reseller relationship with the Vendor/Partner, this involves the Vendor/Partner requesting permission to receive “some level of access” to your tenant. This is simply approved by having the customer click on a link. Once the relationship is established, the Vendor/Partner can enroll devices on your behalf.
You can read more about this here, Obtain a customer’s admin privileges – Partner Center | Microsoft Docs (Delegated Admin Permission is not a requirement).
Online Autopilot Enrolment
If your partner/vendor cannot upload the devices for you for whatever reason, or your elect not to use this method, then you can manually enroll devices into Autopilot. The most efficient method for doing this is described below. There is however a prerequisite for you/users to using this, and that is that an element of Graph permissions need to be allowed as the script uses the Connect-MgGraph command with the following scopes:
Device.ReadWrite.All
DeviceManagementManagedDevices.ReadWrite.All
DeviceManagementServiceConfig.ReadWrite.All
Group.ReadWrite.All
GroupMember.ReadWrite.All
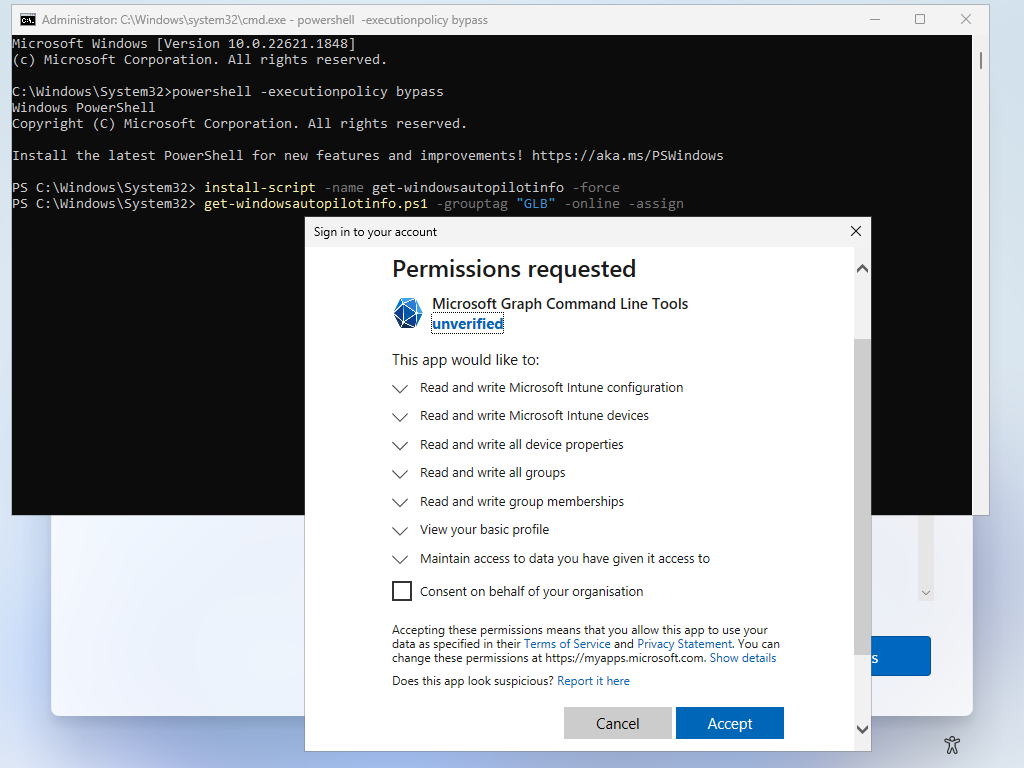
Group permissions are required to cover usage of the “-group” parameter which allows devices to be added an existing Security Group… The best way to allow these permissions is to ensure that you’re trying to enroll the device using an account with Global Administrator (GA) permissions. After authenticating, you will be prompted (the first time) to allow the Graph permissions across the tenant…
How to enroll…
- From the very first OOBE window, press Shift + F10
- Run PowerShell from the cmdline by typing powershell -executionpolicy bypass
- Type the following commands to install the Autopilot script;
- Install-script -name get-windowsautopilotinfo -force
If your device is on wireless, you may need to run start ms-availablenetworks: from the powershell commandline, and connect to the Wireless using the UI.

Execute the newly installed Autopilot PowerShell script using the following command;
Get-WindowsAutoPilotInfo.ps1 -GroupTag “UK” -Online -Assign -Reboot
- This generates the unique Autopilot hash.
- Adds a GroupTag “UK” which can be used for various things inside Intune, such as assignment to specific security groups that have the Dynamic Query configured. This is sometimes referred to as OrderID. For example, the UK variable could be configured to add this device to a Windows 10 devices UK security group, which in turn would deliver an Autopilot profile specific to the UK (which defines things like hostname, timezones and other UK specific settings for example). We can use this tag again, in a Dynamic Security Group for things like the automation of policies to Desktops, Laptops, Hybrid joins for example etc…
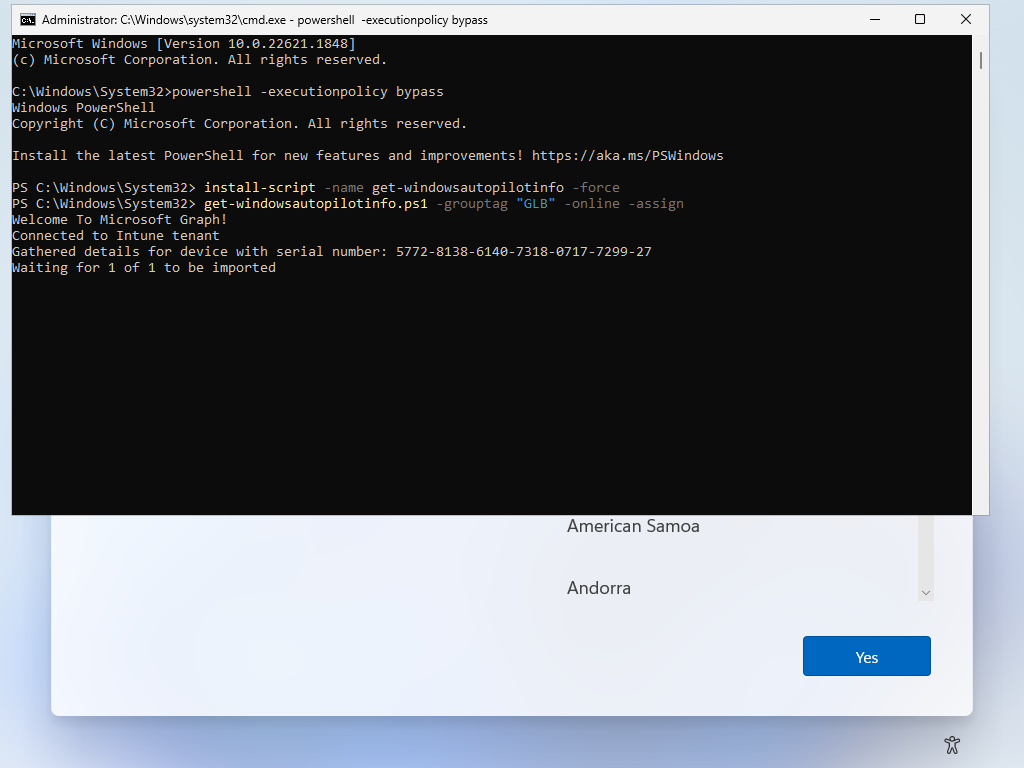
- The -Online parameter performs an online enrolment of the device. I.E. this automatically uploads the device hash and pulls down the relevant profile “live”, so that you can immediately reboot the device and proceed with an Autopilot deployment. (This requires you to authenticate using your Cloud account with sufficient privileges to join devices to AAD/Intune).
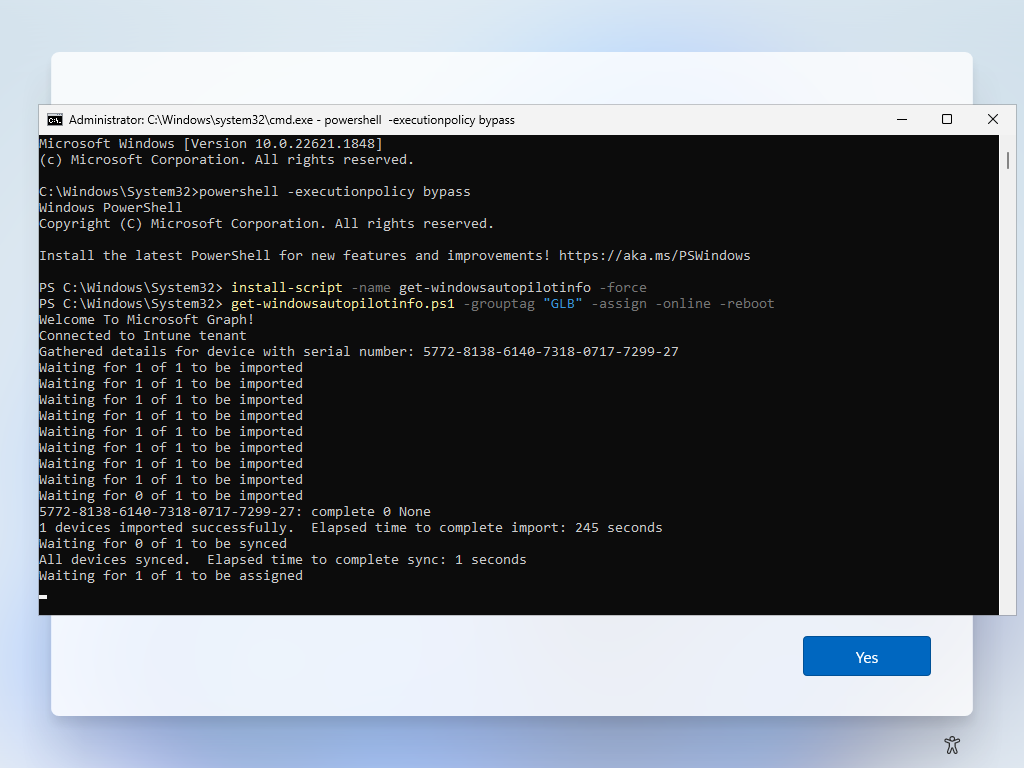
- The -Assign parameter will wait for the Autopilot profile to be assigned and downloaded before continuing.
- -Reboot will reboot the device after the Autopilot profile has been assigned, this is necessary to apply the downloaded profile (and apply the computer name, if specified).
The following images show the process described above.


If you don’t see/get the “Consent on behalf of your Organisation” checkbox, you do not have the permission to Grant Admin consent for your environment. You will need/want someone with a GA account to attempt the action and/or have someone with a GA run the following command (with the relevant PowerShell modules present);
Connect-MgGraph -Scopes "User.ReadWrite.All,Group.ReadWrite.All,Device.ReadWrite.All,DeviceManagementManagedDevices.ReadWrite.All,DeviceManagementServiceConfig.ReadWrite.All,Group.ReadWrite.All,GroupMember.ReadWrite.All"

After the device is enrolled, and the profile assigned, the device should be rebooted.

If you used the -Reboot command, this would happen automatically, if not, simply type shutdown -r -t 0 -f and wait for the device to come back up.
Leave a Reply