I’ve been meaning to capture this here for a long long time but have never had the time to do so. This article will walk you through creating an App Registration in Entra, for use with connecting to Microsoft Graph API via PowerShell, with a limited set of permissions.
The article will focus specifically on the use of John Seerden’s (jseerden) IntuneBackupAndRestore module – one of my most frequently used (and loved) modules!
Before starting, the assumption here is that you have sufficient permissions within Entra to create and configure App Registrations. (Role: Application Developer)
How to…
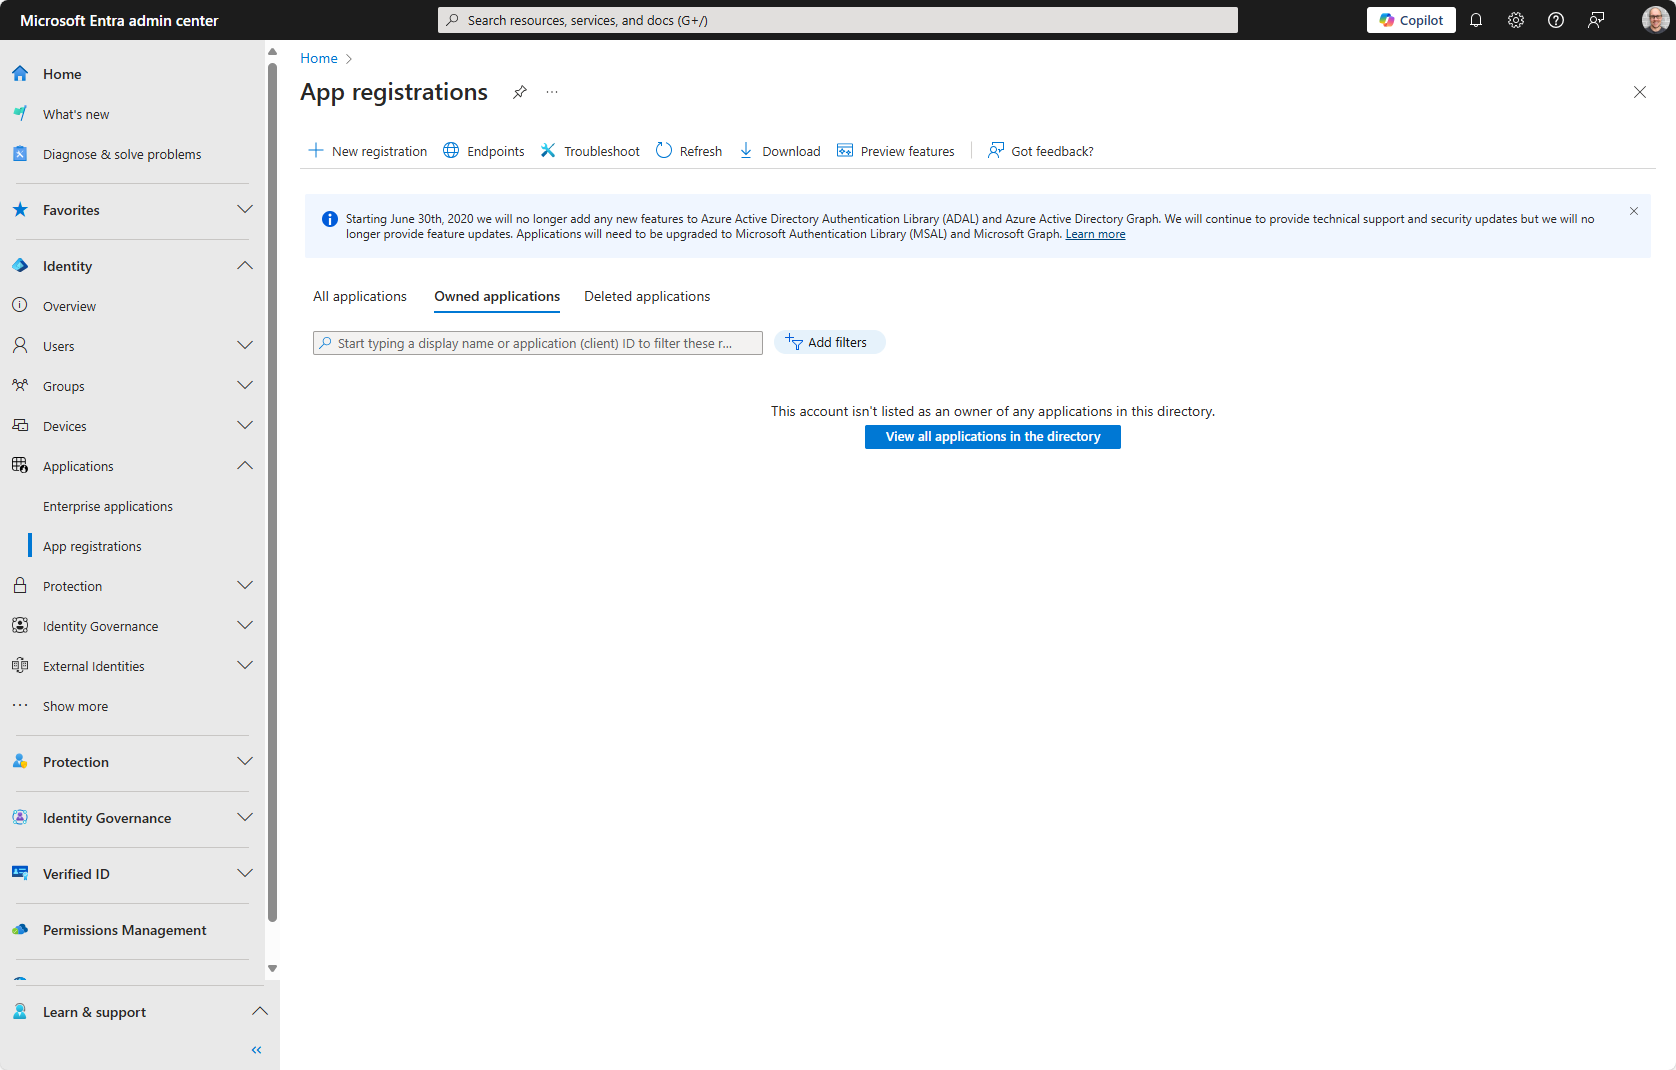
Start by logging into Entra. Then from the left-hand menu, select Applications and then App Registrations.
Click on New Registration in the upper left.
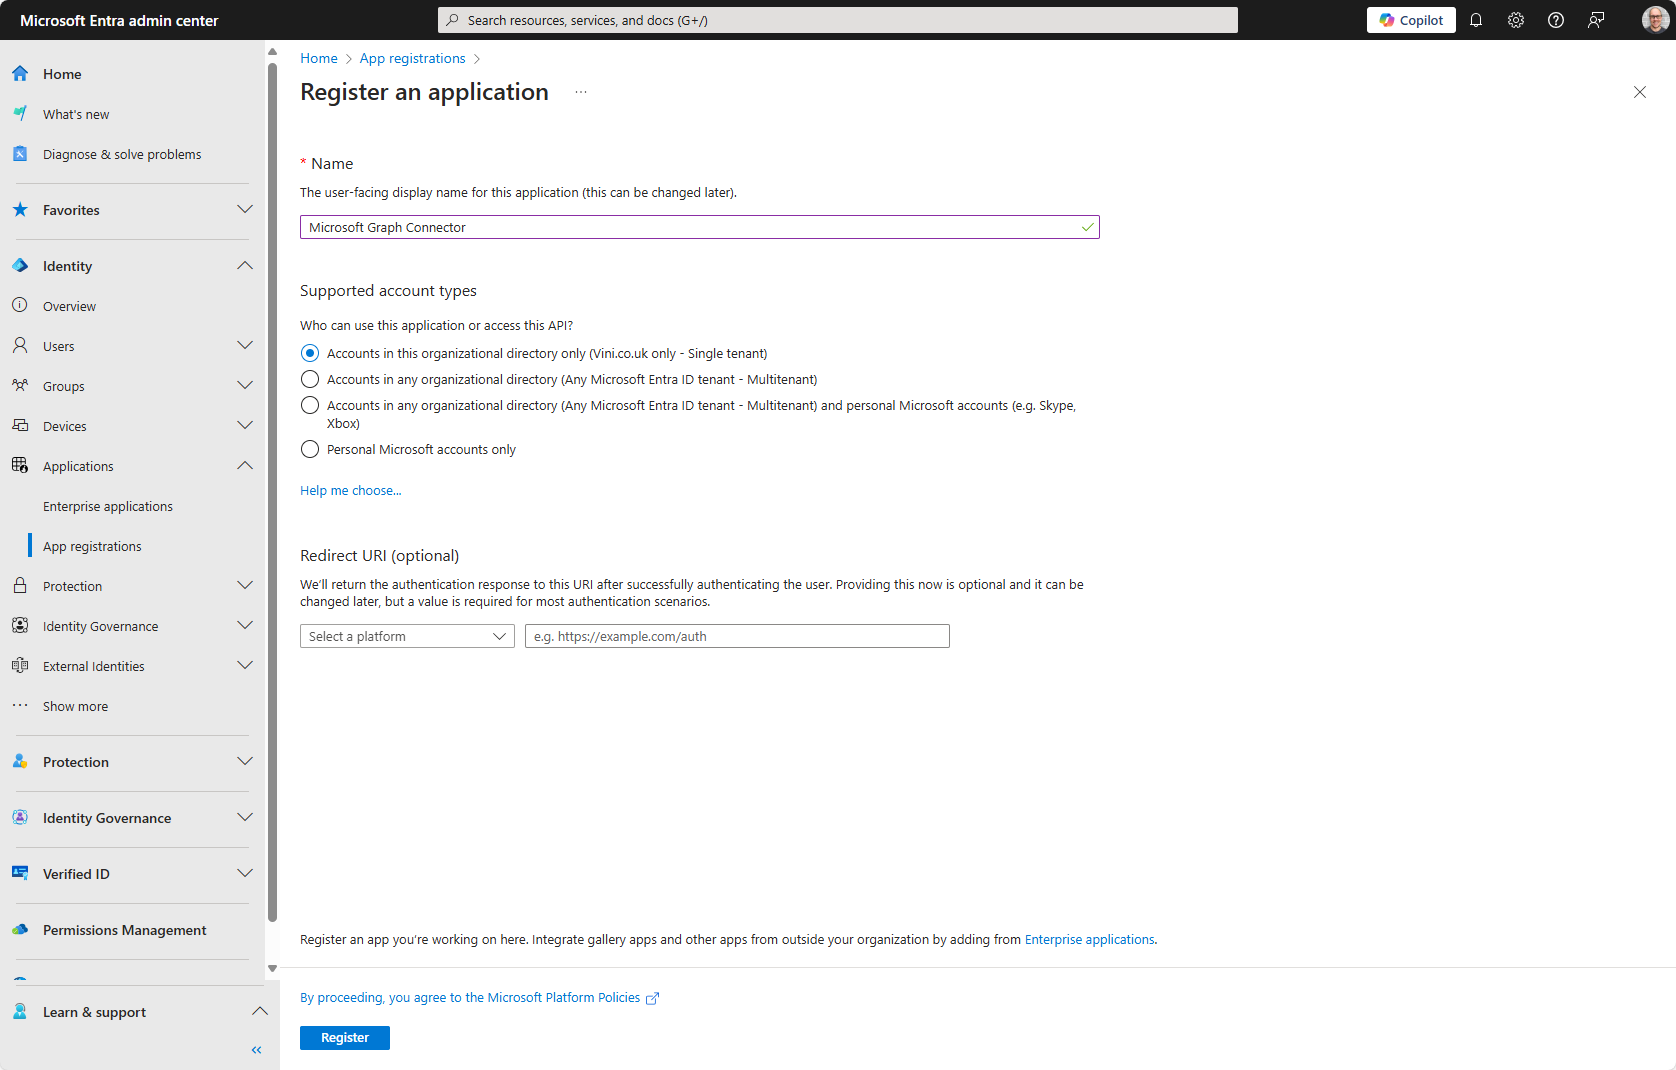
When prompted, give your Application a Name and click Register.
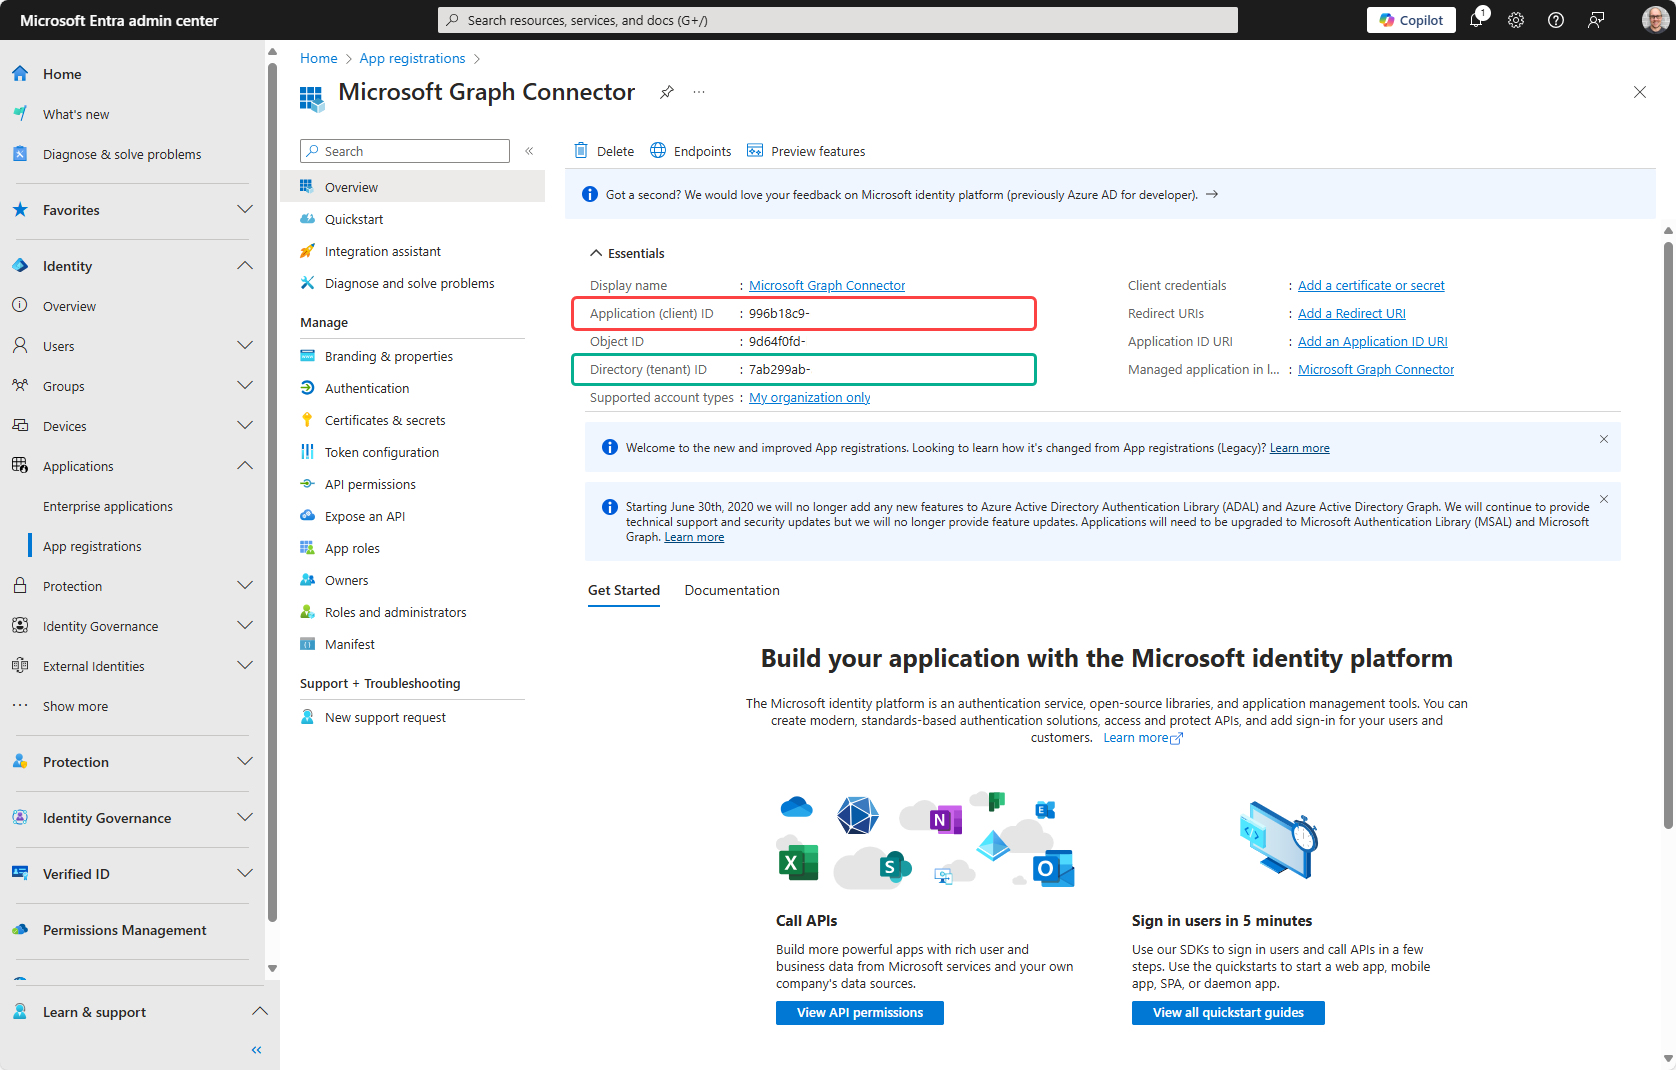
You will then be taken to the Overview page of the newly created Application.
On this page you will be shown some crucial details, which are worth recording. Specifically, the Application (client) ID and the Directory (tenant) ID. Record these, as these will make up the connection string we need to use to connect using PowerShell.
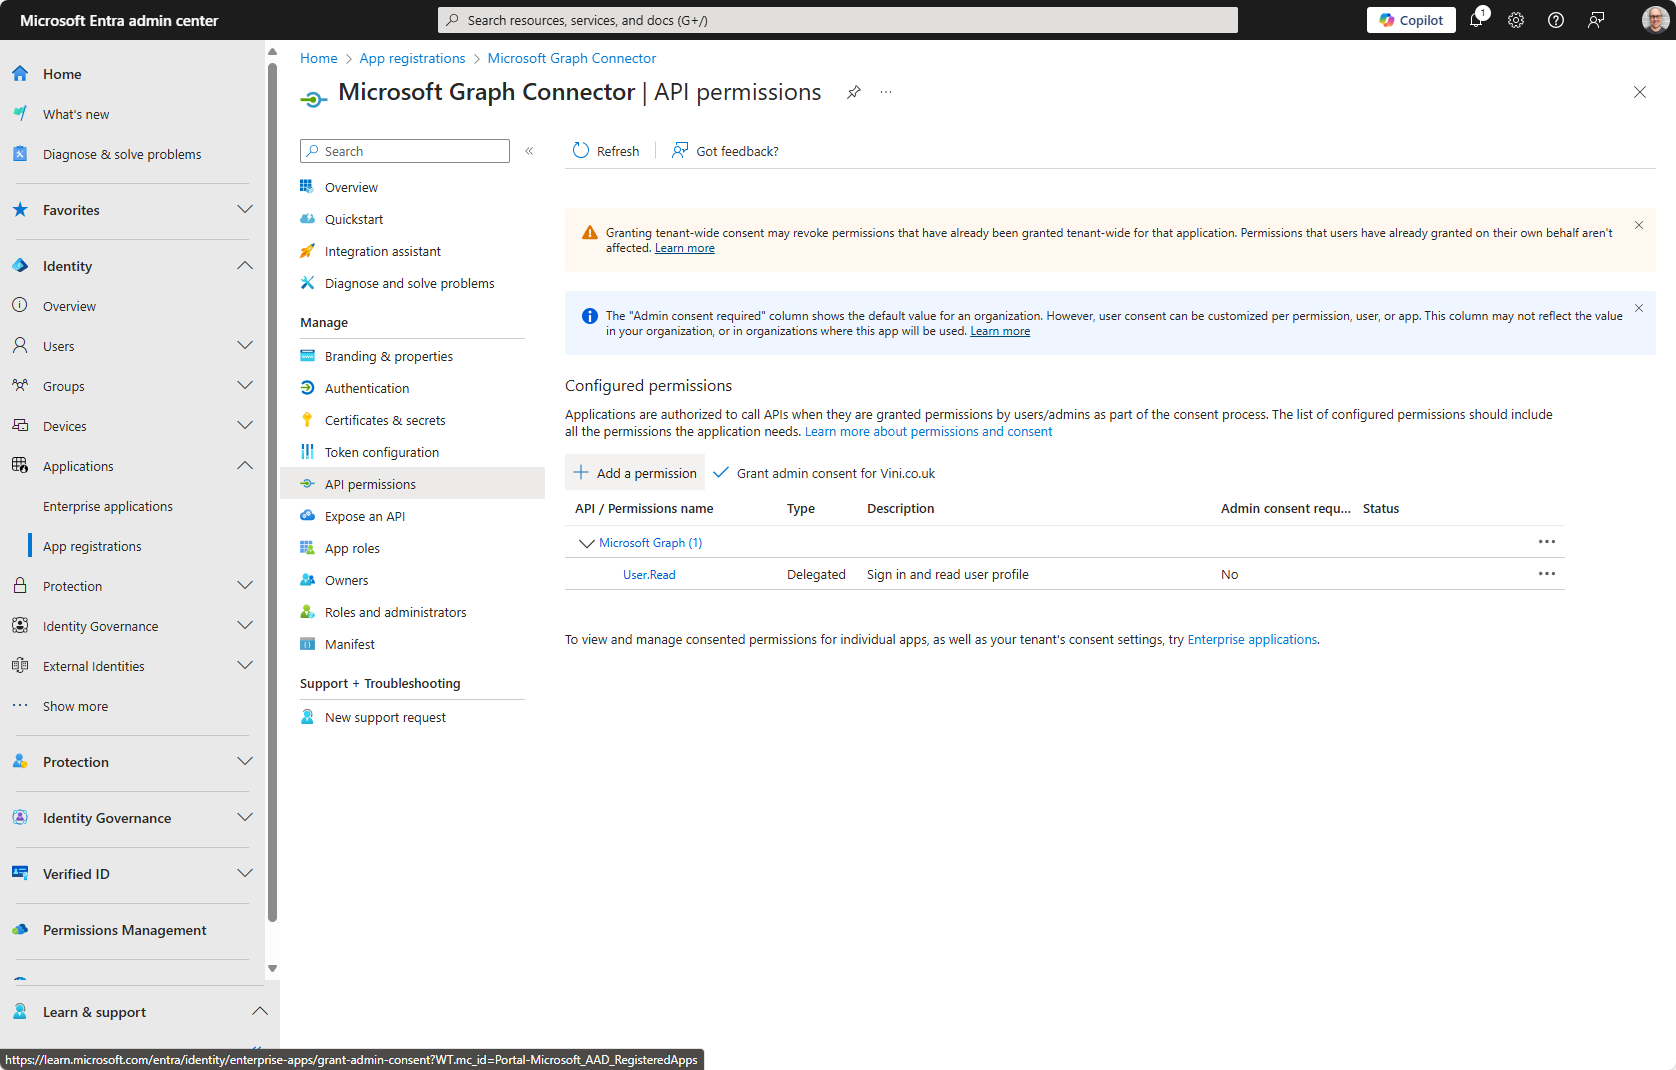
From the Overview, select API Permissions from the left-hand menu. This is where we will define the permissions that this app registration can use, against certain API’s, which in this instance will be Microsoft Graph.
Select Add Permission.
Select Microsoft Graph.
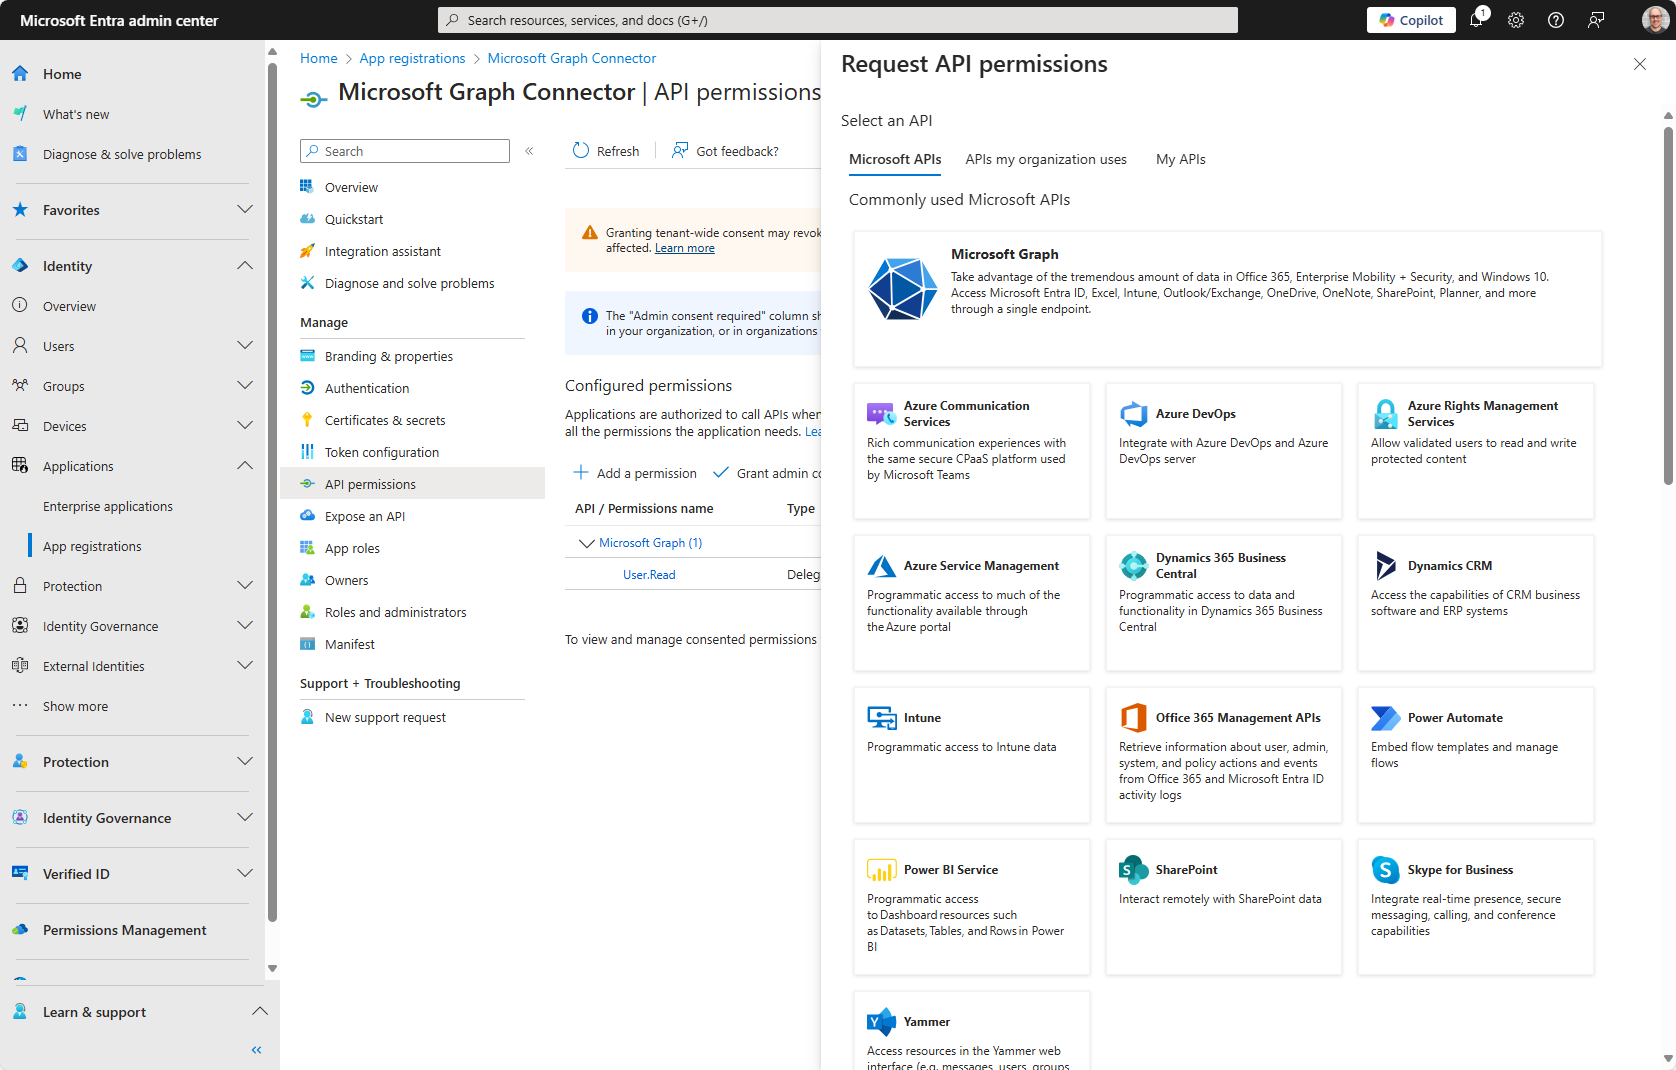
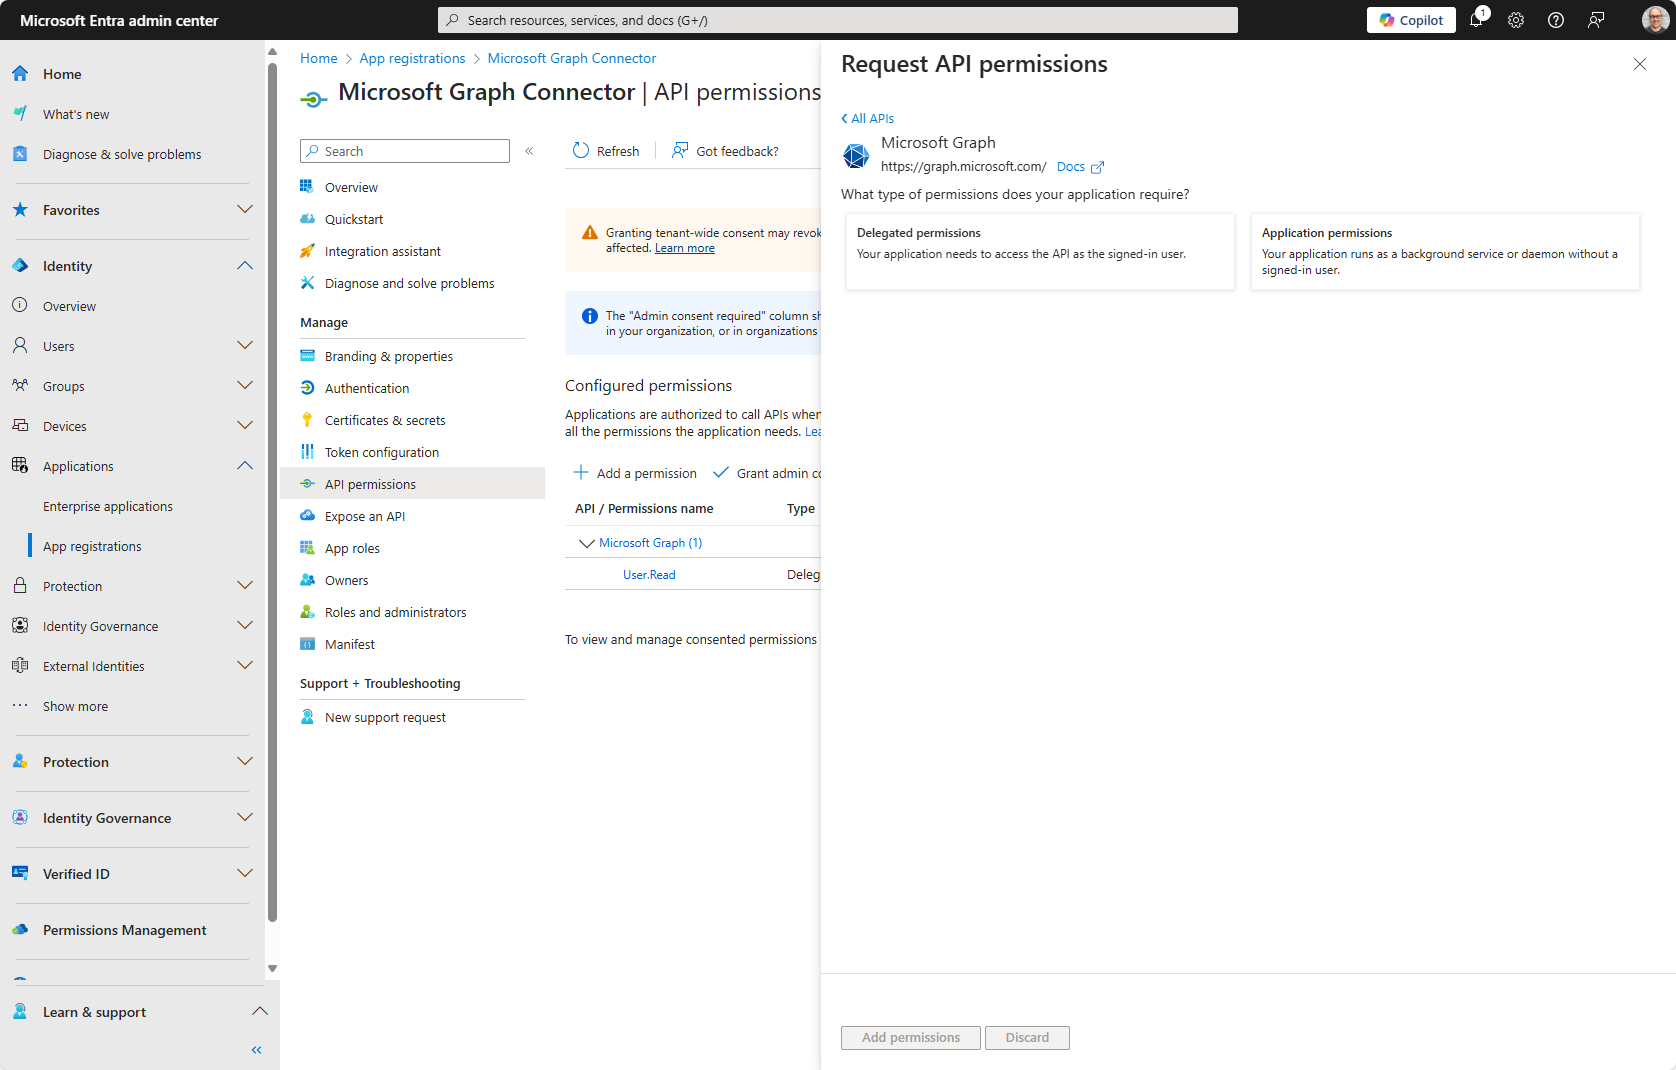
Select Application permissions.
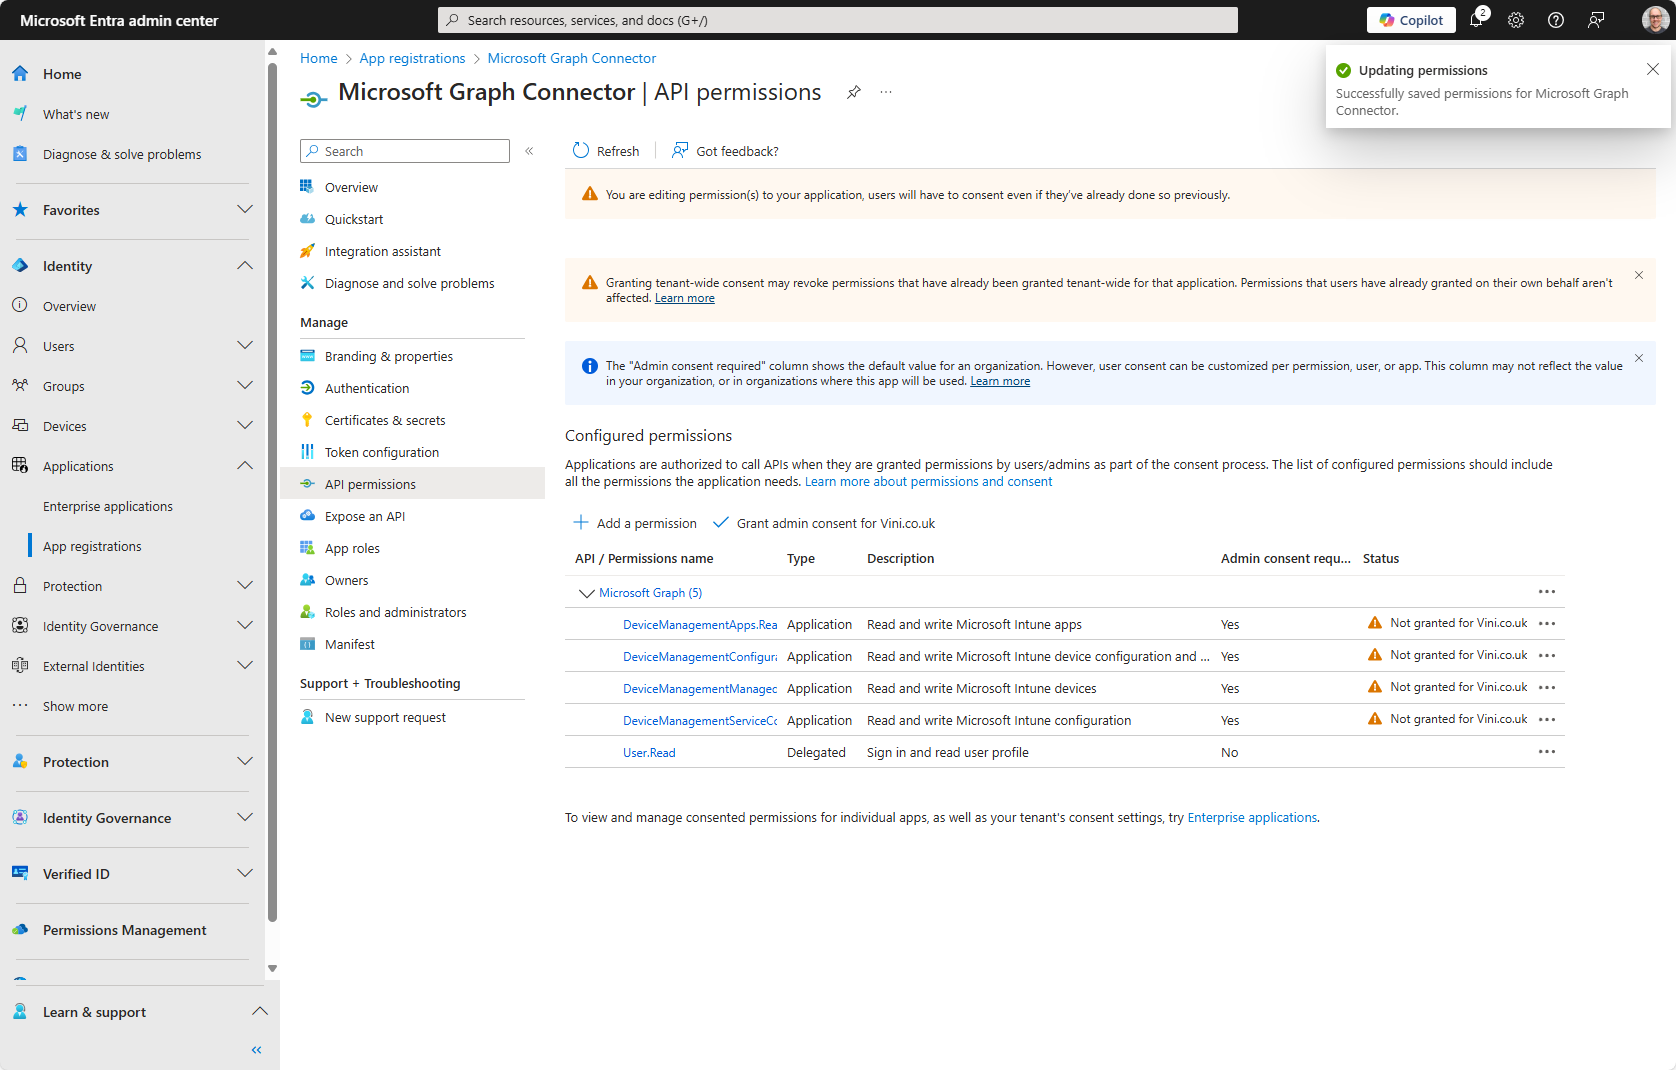
And then add the permissions that you require.
From reading the IntuneBackupAndRestore script, we know that the following permissions are required to operate. As such, these are the permissions we will be defining in this example. If I were Administering the environment on a day-to-day basis, I would likely include device, user and group permissions (Group.ReadWrite.All, User.ReadWrite.All, Device.ReadWrite.All), so that I can administer entirely using Graph API.
DeviceManagementConfiguration.ReadWrite.All
DeviceManagementApps.ReadWrite.All
DeviceManagementManagedDevices.ReadWrite.All
DeviceManagementServiceConfig.ReadWrite.All
This will give you the following output.
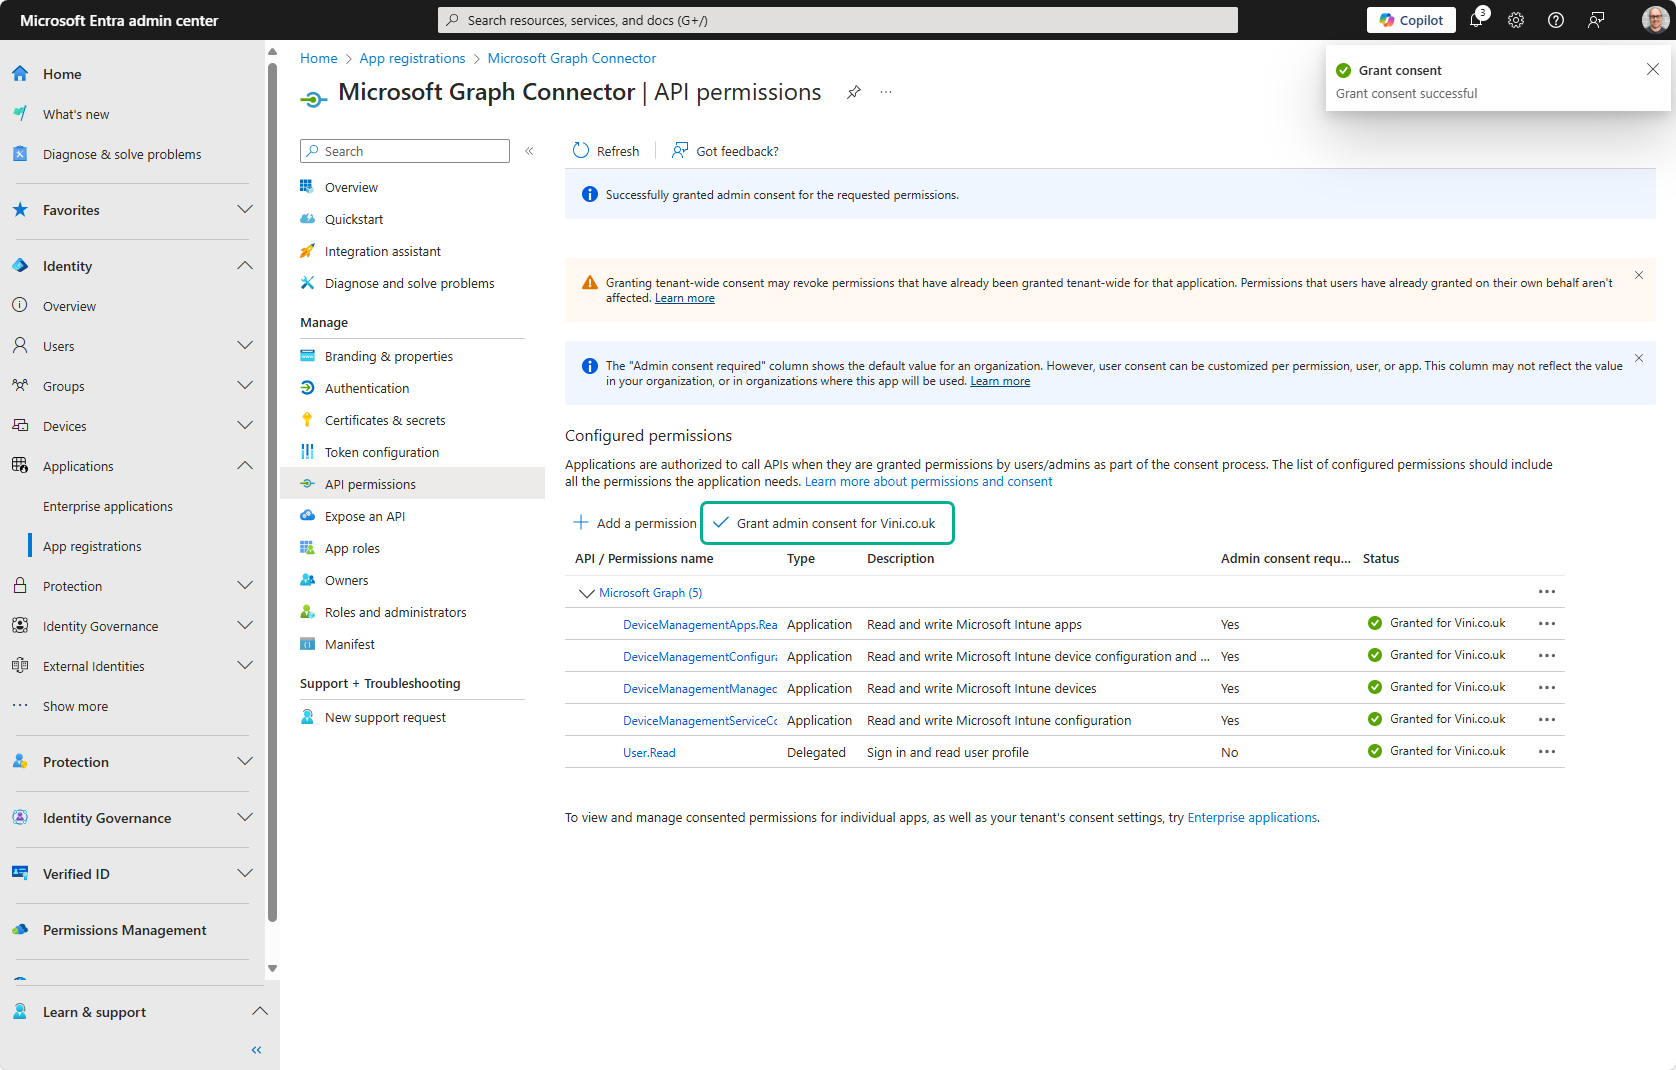
The next thing we need to do, is Grant consent for these to be utilised. Click Grant admin consent for Tenant, and heed the warnings prompted.
From here, click on Certificates & secrets, down the left hand side.
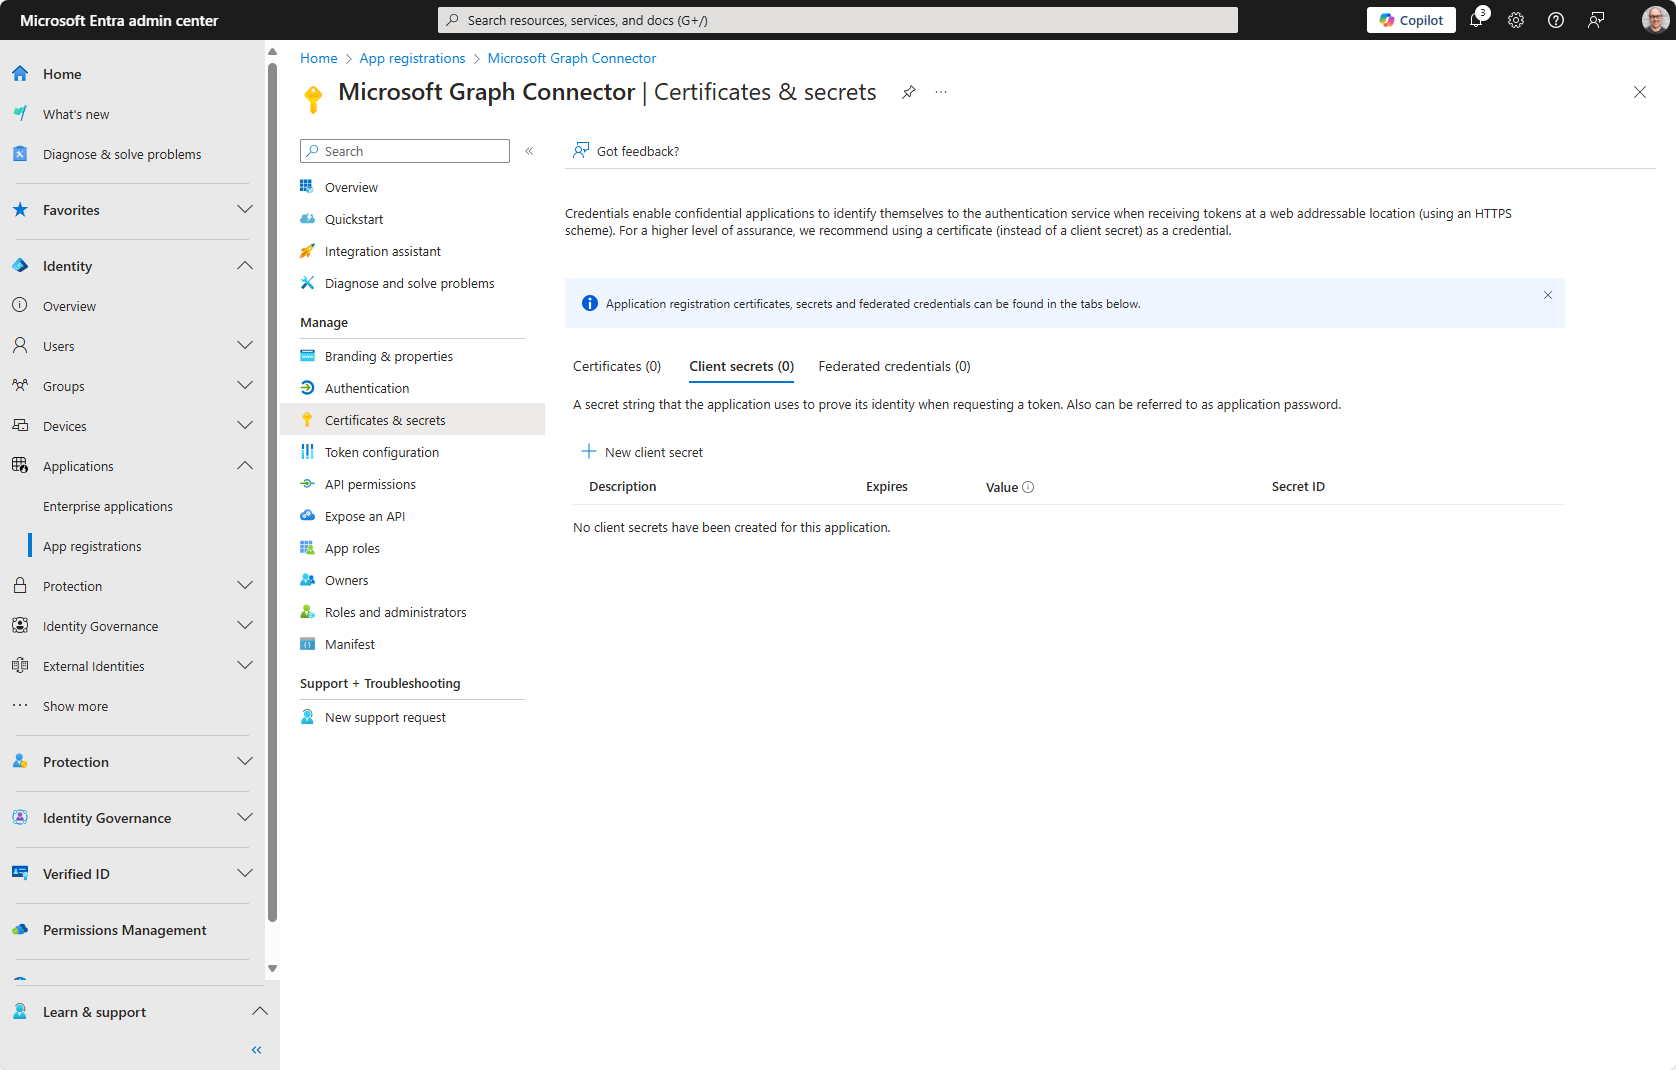
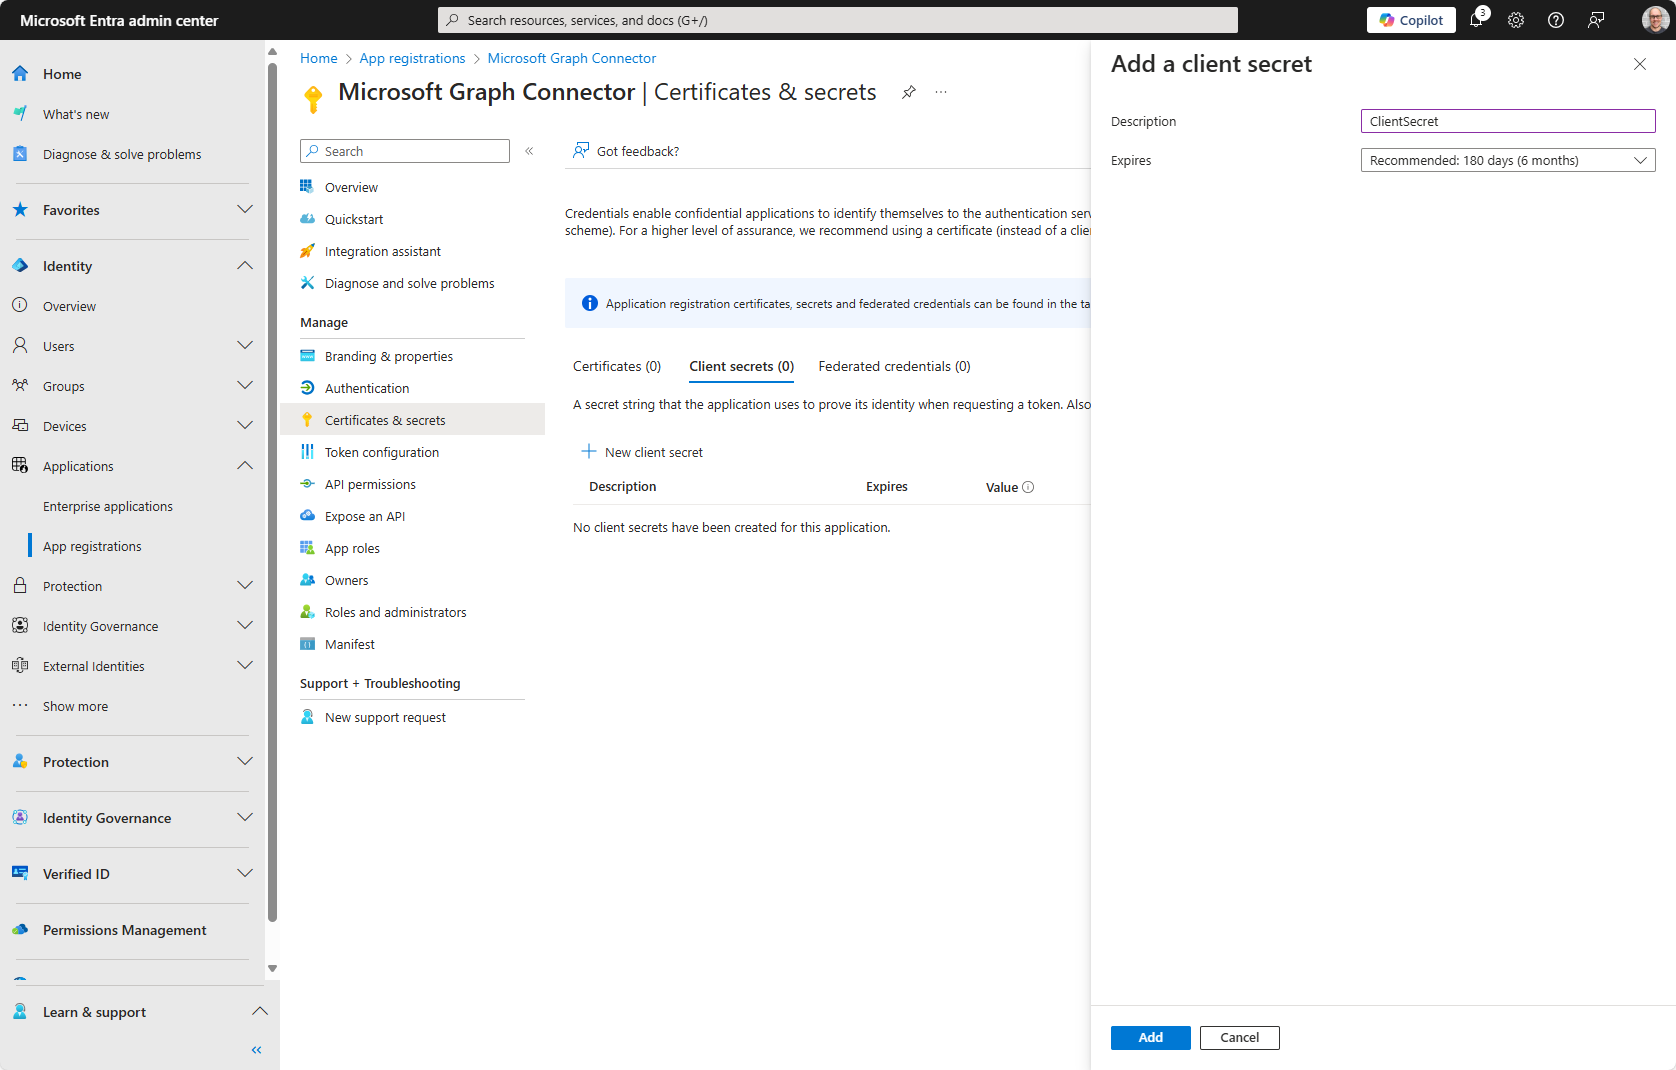
Within Client secrets, select New client secret. Give the secret a description/name, and select how long you wish the secret to remain valid for before it expires. Click Add.
After clicking Add, you will be taken to the Overview of the Client secrets page. Copy the Value of the newly created Client secret. Keep this with your previously captured Application ID and Tenant ID. These three bits of data will make up the connection string required to connect to Graph API using PowerShell.
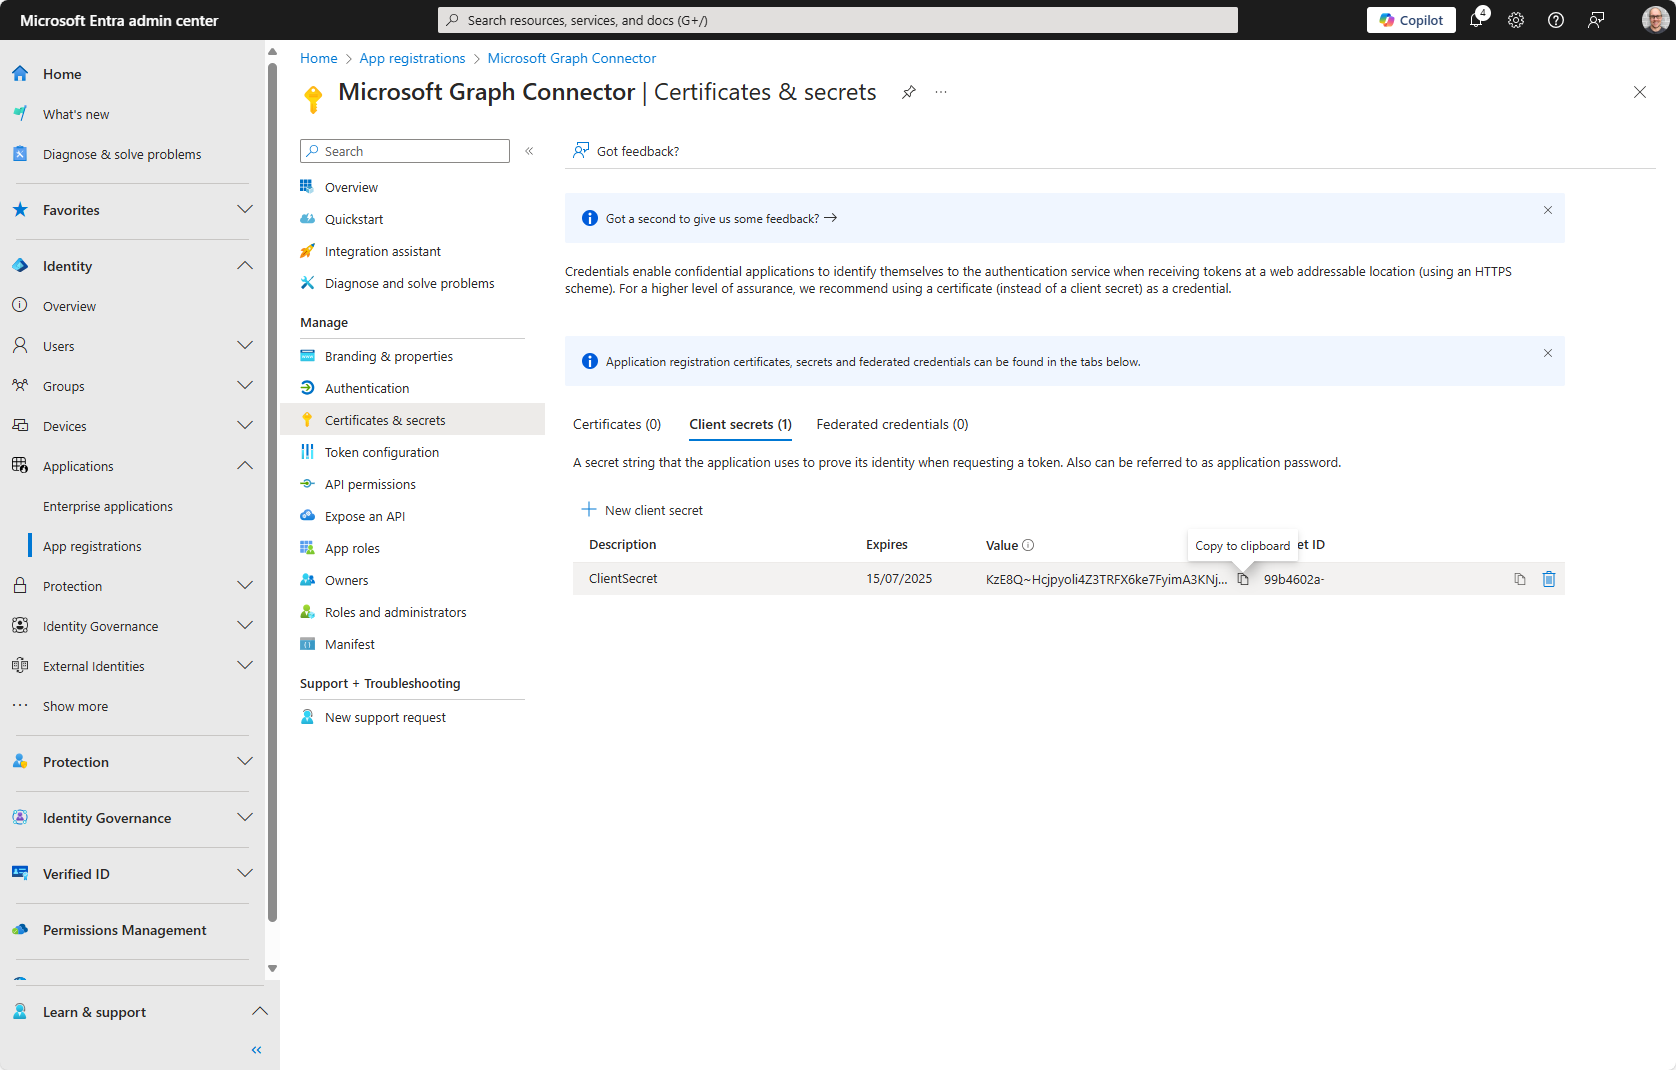
Note: The string cannot easily be retrieved if you do not copy the Value at this moment in time. Very worst case, if it becomes obfuscated/lost, delete the Client secret, and generate a new one.
Now we have the App Registered and Client Secret defined, we have all we need to attempt a connection.
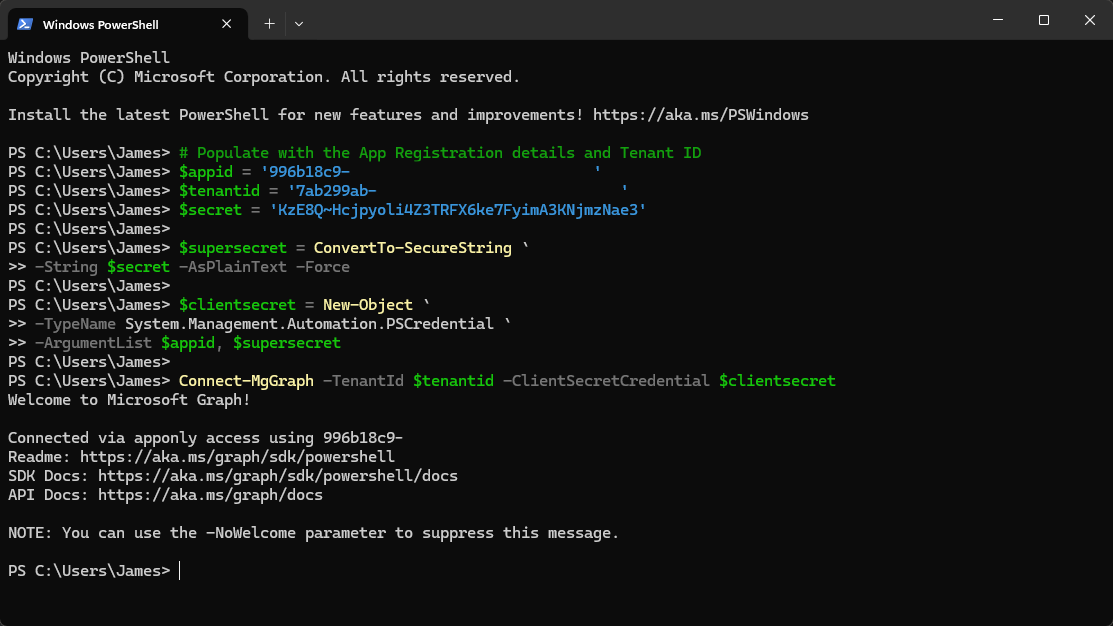
Open up PowerShell, and this is the command we will utilise;
# Populate with the App Registration details and Client secret.
$appid = '996b18c9-YOUR-Application-ID'
$tenantid = '7ab299ab-YOUR-Tenant-ID'
$secret = 'KzE8Q~Hcjpyoli4Z3TRFX6ke7FyimA3KNjmzNae3'

# Convert the Client Secret to a Secure String to avoid issues.
$supersecret = ConvertTo-SecureString `
-String $secret -AsPlainText -Force

# Create a PowerShell Credential Object.
$clientsecret = New-Object `
-TypeName System.Management.Automation.PSCredential `
-ArgumentList $appid, $supersecret

# Connect to Microsoft Graph using your App Registration details.
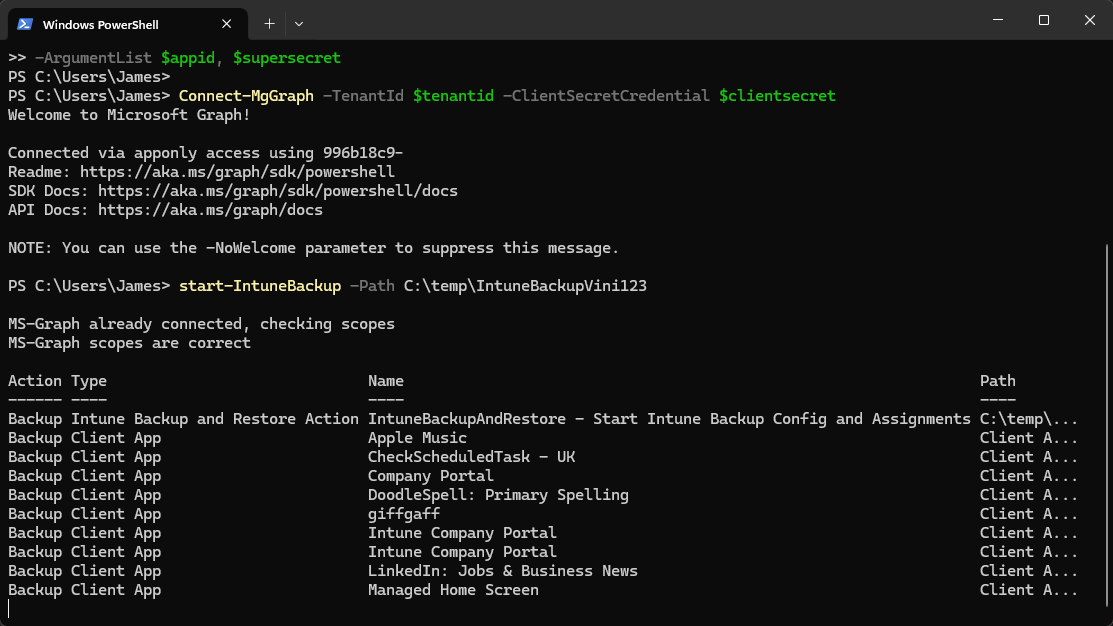
Connect-MgGraph -TenantId $tenantid -ClientSecretCredential $clientsecret
Your PowerShell session should connect successfully to Graph using the information provided.
From here we can execute the IntuneBackupAndRestore script, which will perform a pre-flight check to ensure that the Graph permissions are suitable for the script to run. Assuming you configured the API Permissions correctly in your App Registration, the script should report that your MS-Graph scopes are correct, and the script should execute.
Happy days…
At this point, should you decide you need more Graph API permissions, you can either add them to the API Permissions against the App Registration we created. OR. You may decide to have different App Registrations offering different levels of access, maybe in a kind of RBAC manner. The choice here is yours.
Leave a Reply