My son has recently been hammering Forza 6, and not only has he gotten quite good at it, but his awareness of cars and buying/selling has come alive. Of course, in Forza, you can buy/sell cars at the touch of a button, which I guess you can in real life. However, with Forza, your digital credits have zero impact on the real world, unlike thousands of pounds of hard earned cash.
Anyway, I’d been contemplating a Mustang 5.0, possibly as part of a mid-life crisis. But lets be real, the economic climate isn’t really one to support such a purchase. However, the UK Weather over the recent months has left me really impressed with how well my Solar panels have worked out, and sure, “it’s a good year, next year might not be quite so good”, but it’s made me think. It made me think how beneficial a full EV would be with my current home setup.
Long story short, a few “what if’s” led to my son getting very excited at the prospect of a new car. His giddiness rubbed off on me, and before I knew it, I’d sold my old Ford Kuga and was on the hunt for a Tesla Model 3 – a car I had fancied from release. Actually, I fancied an S, with Ludicrous, but funds don’t stretch that far… and Tesla in the UK pretty much standardised on the Y and 3 models.
When I had my mind set on a Tesla, I tried out their contactless, self-serve Test Drive, in which I took away a 2026 Model 3 RWD for an hour. It was hardly enough to establish anything really, especially by the time I’d taken it home to work out if my Ice Hockey kit would fit in it. I then test drove a Legacy Model 3 LR AWD – the better sound system offered up by the LR AWD was a big plus for me, along with a few other niceties offered by the LR AWD.
I spent a few days going back and forth between the “Legacy” Model 3, and the facelifted “Highland” model (2024+), and decided to push the boat out and go Highland. A rather “rare right now” Highland in Quicksilver came up and I pounced.
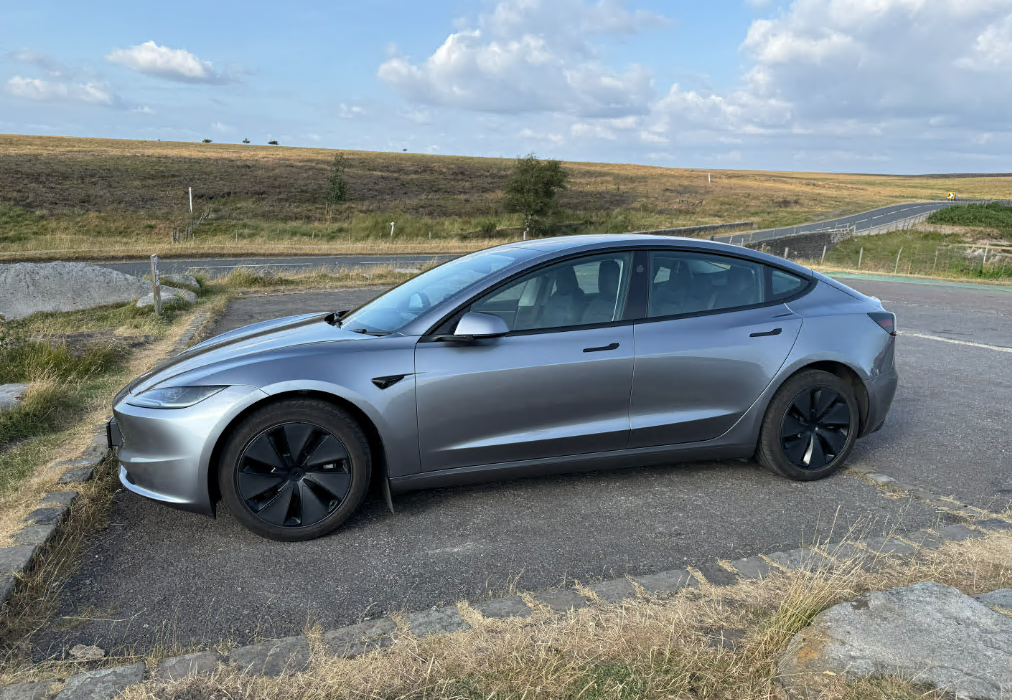
In all my research, I’d not factored in the little things, the small changes in each annual revision made by Tesla, and to that, I mean, I’d not realised the earlier Highland models didn’t have indicator stalks… A bizarre move, one that stinks “American”, and one that I knew would probably upset my wife. I figured I’d get used to it, but then again, I’m not sure you would ever get used to trying to escape a roundabout at the third exit, when actually indicating to inform other drivers of your actions. The reason I say this stinks of being an American decision is their lack of roundabouts. If you’d have tested this out on “real roads”, you’d probably have established what a bad decision putting buttons on the steering wheel would be, or maybe not, I guess removing the stalks saved money and money talks.
A quick Google revealed that in the early Highland model, Tesla had removed the stalks. It also revealed that the stalk (note, singular), at least for indicating was returning in the 2026 models, and was returning as an official retrofit part/order. Unfortunately, the reinstated stalk, was just that, a single stalk purely for indicating. My wife had already mentioned the lack of clarity when needing/wanting to use full beam, and the official retro fit option was not going to help with that.
Googling some more, revealed that our friends over the water to the east have a solution. A full, yet unofficial, retrofit kit, that reinstates both gear select and indicator stalks. It also supports button reconfiguration and the “normal” functionality of being able to use full beam, flash and initiate the wipers – normality.
I should add at this point, there’s a variety of options available. S3XY do a “wireless” option, and on AliExpress there’s wired options from £100 up to £300, plus the ones sold within the UK as “premium options” such as Veekys (which I believe to be rebranded options from Ali). From what I could tell with the £100 and £300 options, the more expensive ones include support for a Bluetooth App, which allows you to potentially update the firmware and change the stalk functionality.
Given my love for breaking/fixing/modifying/tinkering, I knew immediately that this was likely something I was going to have to do. Despite baulking at the thought of paying upwards for £200 for…………. INDICATORS. But hey, I opted to land in the middle of the suggested price range, selecting the VJOYCAR 2025 New Gen3 Gear Stalk Lever For Tesla Model 3 Highland Turning Stalks Shift Handbar OEM Style APP Customized Feature offering, they set me back £165 delivered and ~10 days later… a box.
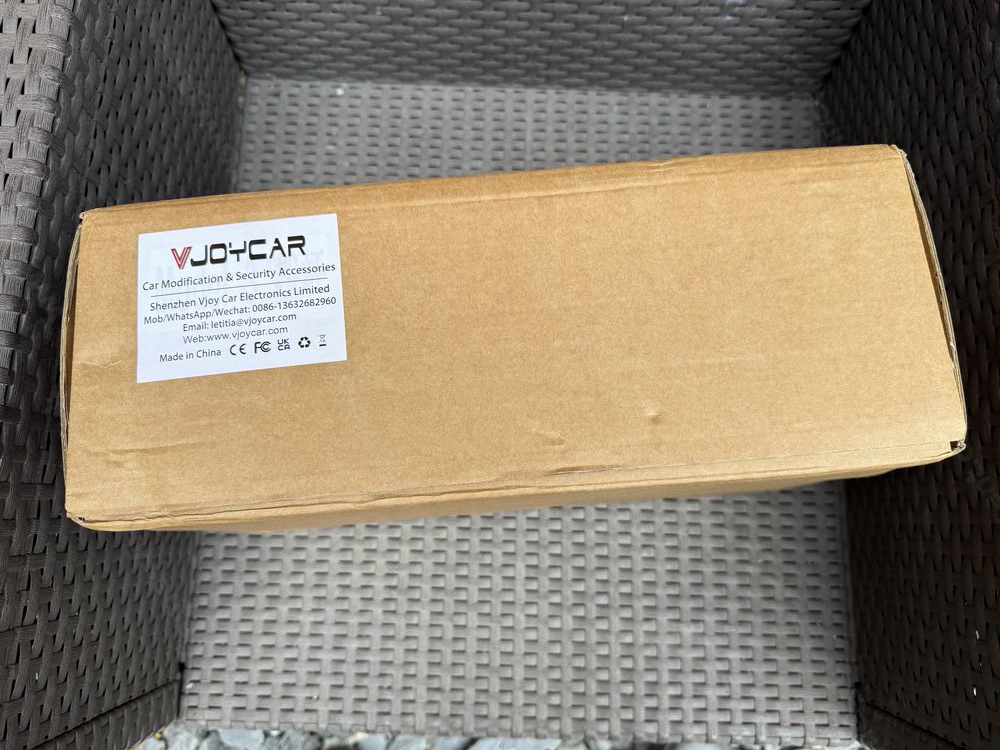
So with the goods in hand, the only thing left to do, is dig out the tools and crack on.
How to install the aftermarket stalks…
You will require;
- A Torx 20 bit/screwdriver
- A 10mm Hex bit/tool (if removing the full Steering Wheel – I did)
- Breaker bar or Impact Wrench (for removing the steering wheel!)
- A trim tool
- Something to fish down the steering wheel (included, but somewhat useless)
- A thin Flathead screwdriver
- A Philips and Pozidrive screwdriver
- Long, Thin nosed pliers
- Patience
- Gloves
Before we begin…
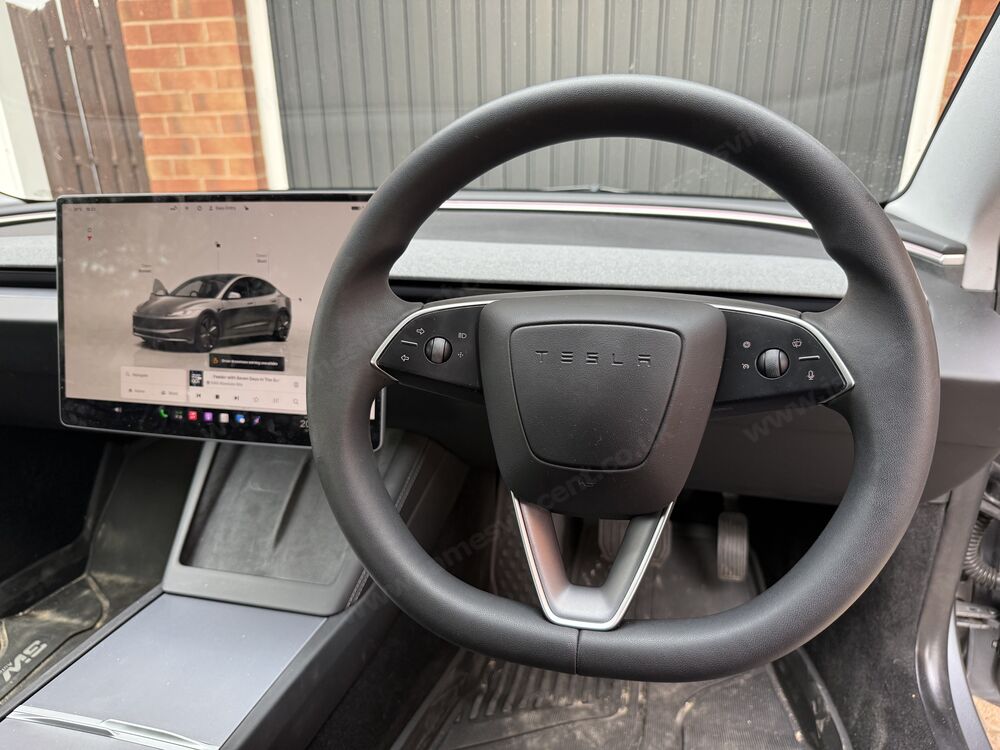
Start by extending the Steering Wheel as far out as you possibly can. This just makes life easier in the long run. Although, scroll down to the end and see my observations and have a quick peek.
Remove the upper shroud from the steering wheel
Grab your trim tool, and attack! Start by prying the upper part of the trim that sits on top of the steering column. I pulled from the rear using my fingers, and then pried apart the sides and lastly the front using the trim tool. I’m not a stranger to ripping vehicles apart, but one thing that impressed me with this car, is the quality of the plastic and clips. I never felt like I was really going to make irreversible damage at any stage during this process.
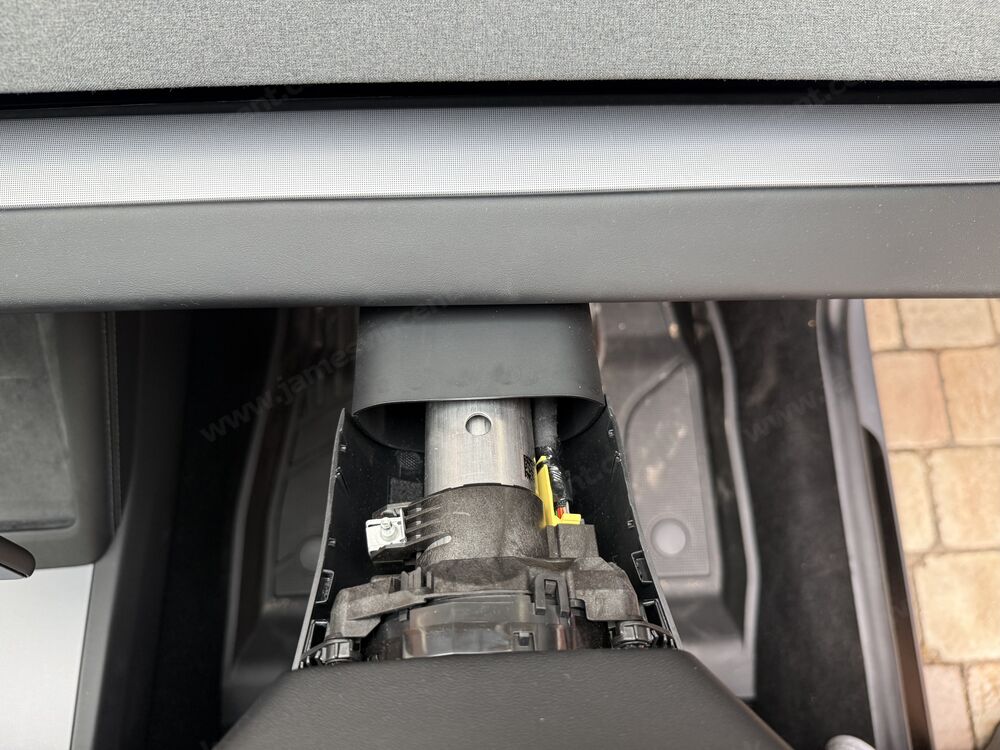
It’s worth adding, at this point some guides stop here, and don’t remove the full wheel. However, the VJOYCAR parts screw into the original wheel mount using T20 screws, so I’d strongly recommend going the distance and removing the wheel. Despite being familiar with smashing cars about, I’d never removed an Airbag or Steering Wheel before this, but honestly, it was a breeze.
Power off the vehicle
At this point, a lot of folks recommend powering off the car, presumably to prevent airbag detonation should anything go awry. Do it, Controls > Safety > scroll to the bottom and find “Power Off“. But the cynic in me is saying that this isn’t truly “powering off the car” to the point that an Airbag wouldn’t detonate, and I’m saying that, on the assumption the airbags are running from the 12v/Low Voltage battery. Anyhow…
Remove the airbag
Using your thin flathead screwdriver, locate the two holes to either side of the steering wheel.
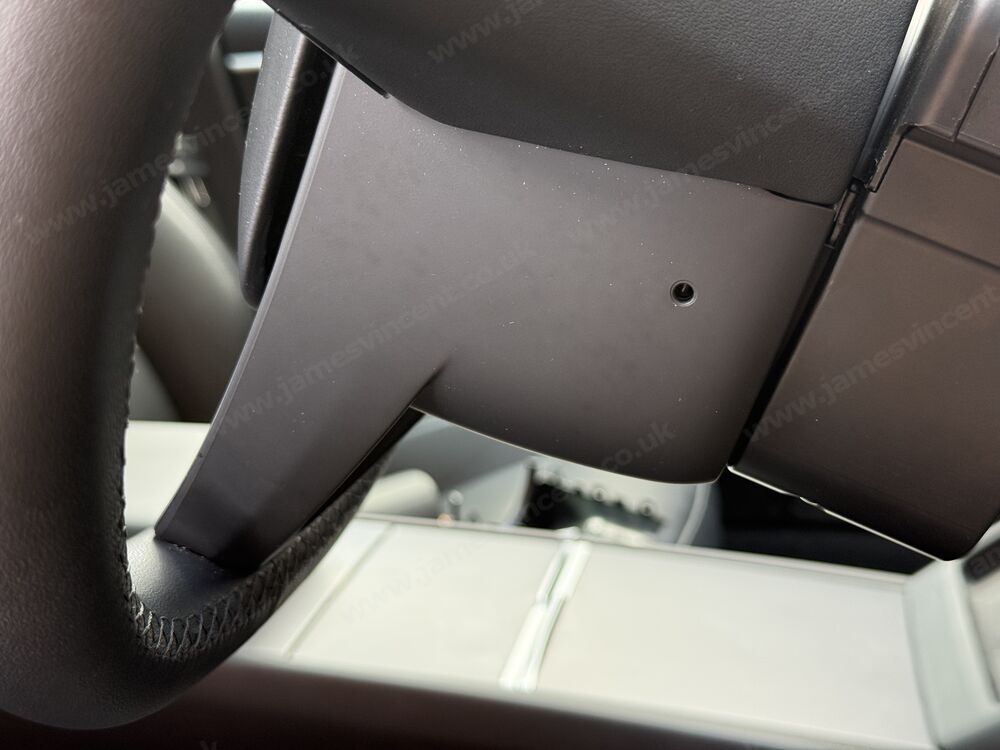
The airbag is secured using two rounded-pyramid style spring clips. A flathead long enough and thin enough really helps adhere to the angle of the pins and releases them nicely. Be gentle, and just get a feel for it. Do one side at a time.
The airbag has a connection going into the DAB port that is revealed. The connector has two pinch release clips at the top and bottom, thin fingers, or thin long nose pliers will help release this. Once this connector is unclipped, the airbag is completely separated. Be gentle with it, and put it aside.
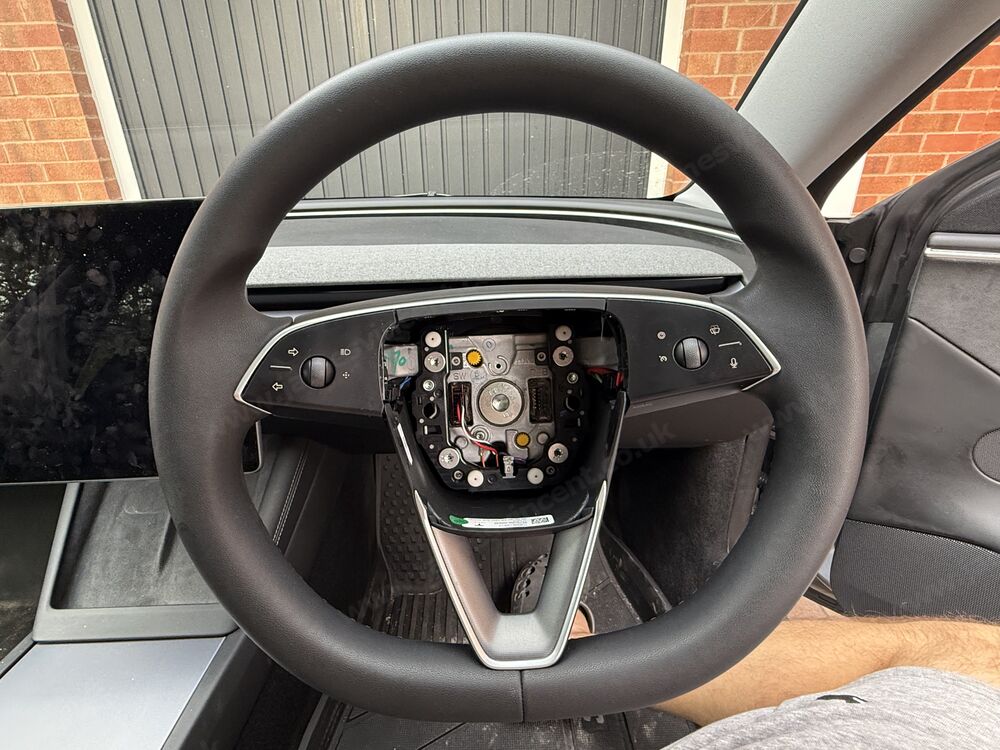
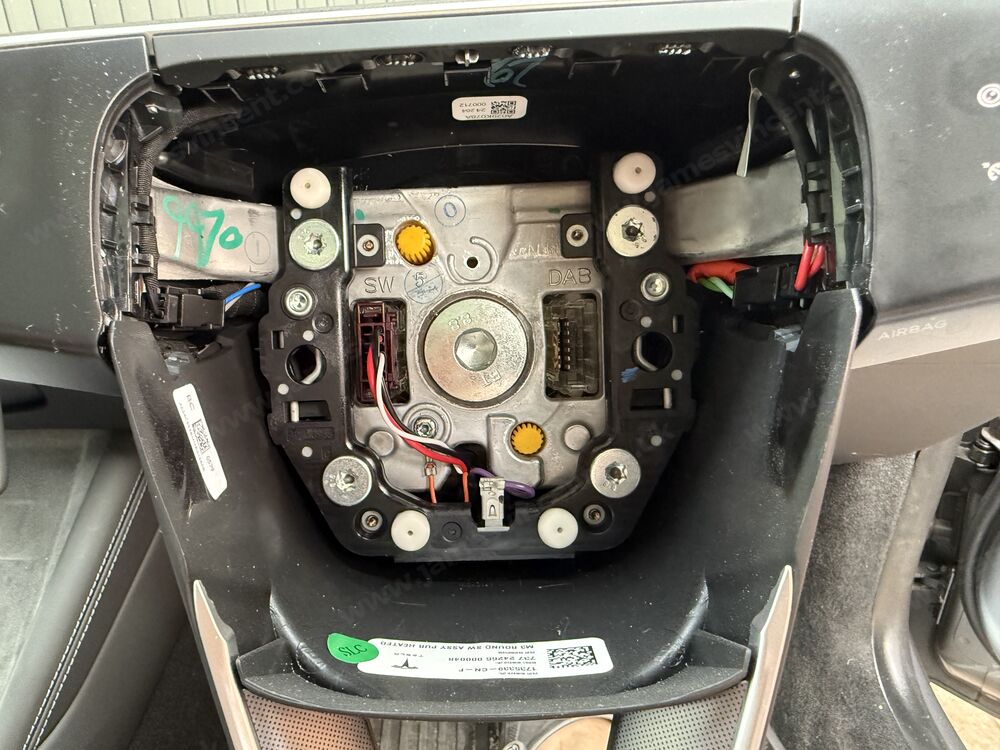
Do the same for the steering wheel (SW) controls.
Remove the 10mm hex bolt
Next up. The hardest bit. You need to remove the 10mm Hex Bolt. This is stiff. I used a long breaker bar with 10mm hex attachment, and my wife, to break this free. It was a joint effort in wrestling the wheel and cracking the nut. This for me was the scariest bit, wreck this nut and a whole world of pain would follow. Thankfully, enough elbow grease allowed us to loosen the bolt and from there I was able to undo it using a much smaller wrench.
Remove the steering wheel
With the bolt out, the wheel just pulls off. There are some alignment lines which are worth paying attention to prior to removing the wheel.
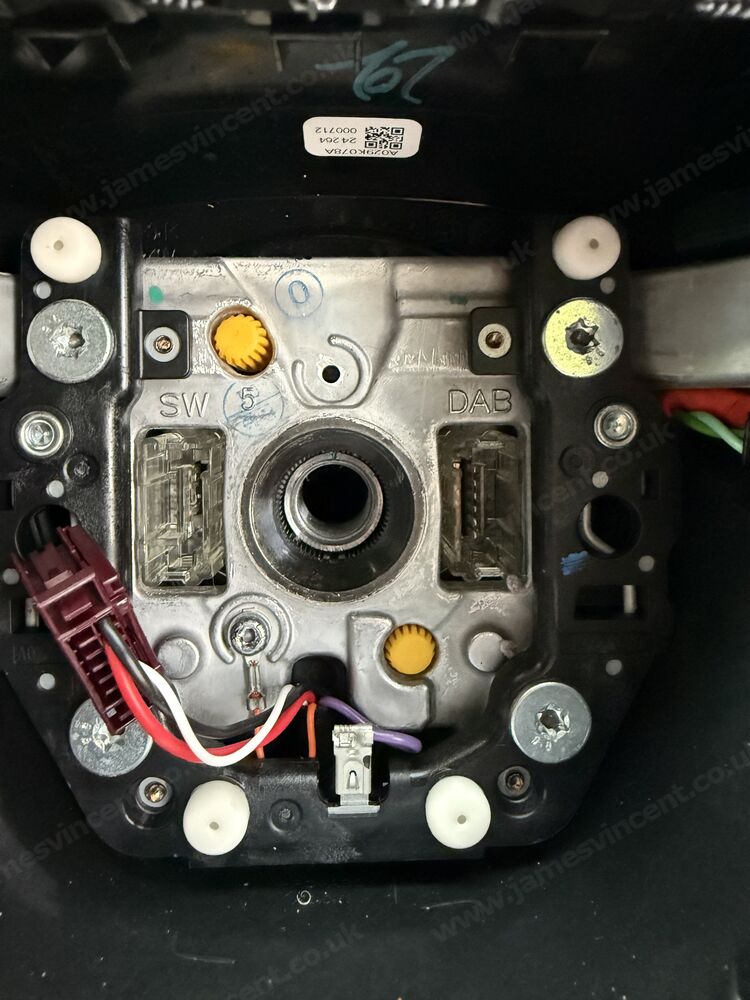
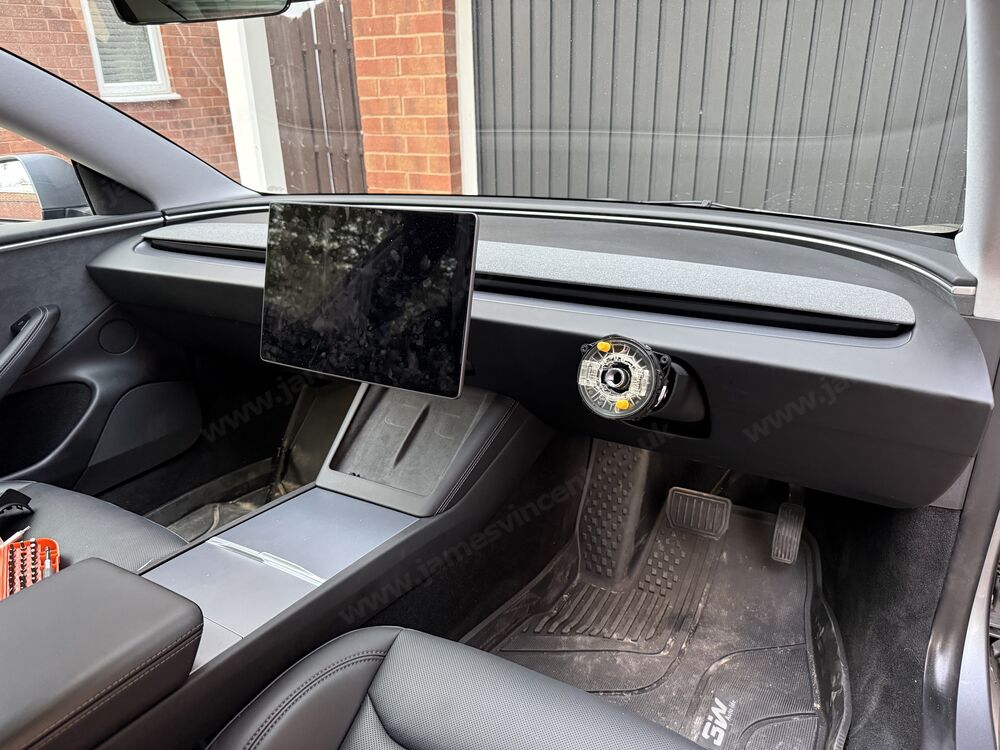
With the wheel off, there’s two T20 screws at the top of the hub holding on the bottom shroud. These need to be removed and kept safe. With that done, installation can commence.
Note! The fun occurs on the drivers side!
All the instructions I followed/videos I watched for this were from China or American installations. Given they’re left hand drive, and we’re right in the UK, I incorrectly assumed that the wiring I would need access to would be on the passenger side. I figured it would be a good time to expose the wiring and run the cable across the center console to the steering wheel especially if the larger connectors were going to need to get to the passenger side – I figured it would be easier to send the smaller wheel connectors behind the nest of cabling. This assumption was incorrect though, and I wasted a good hour fighting with clips after establishing this. There’s nothing to see or touch on the passenger side!
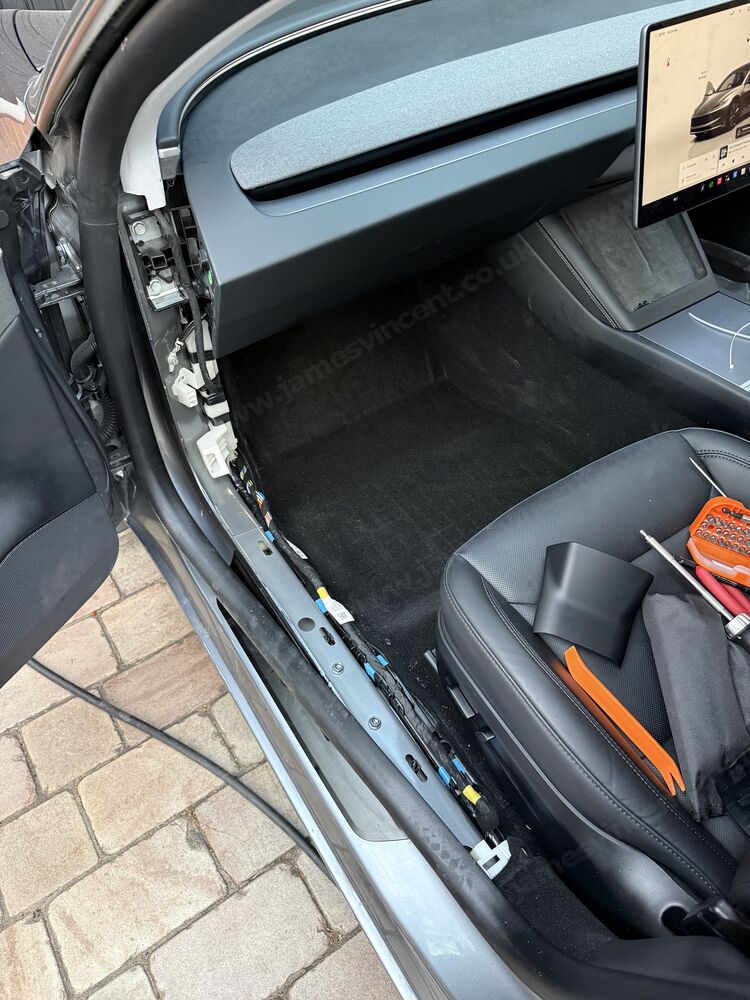
Remove the trim on the drivers side
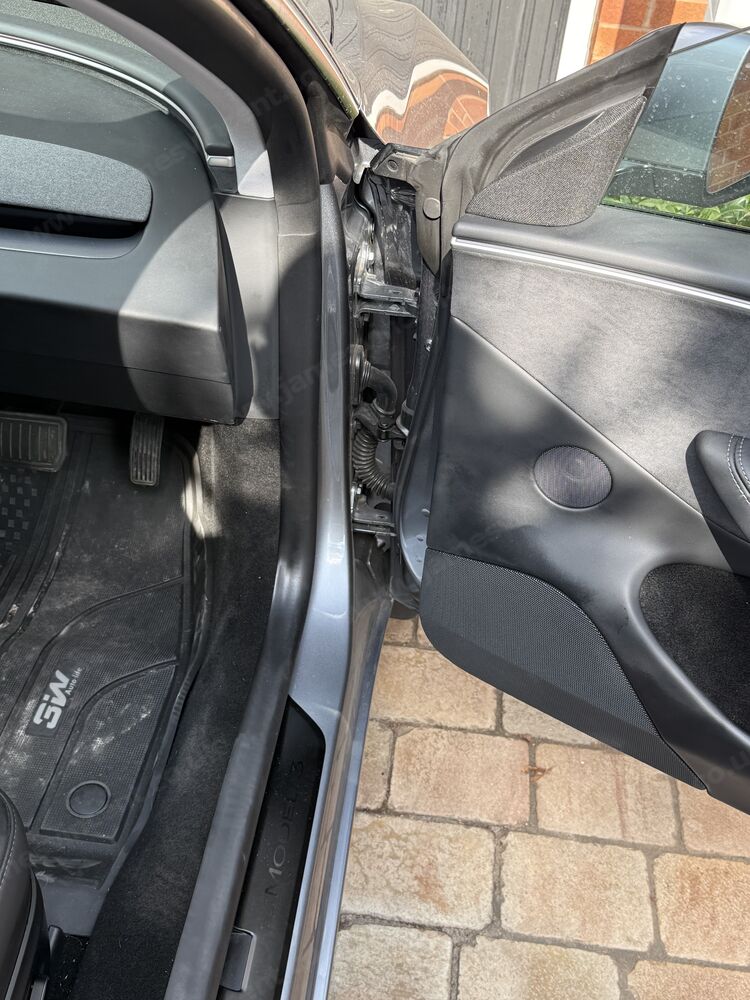
You need to reveal access to the data port, and power lines. This is done on the drivers side. Start by pulling at the rubber door trim/gasket, it simply pulls away from the car, towards you. This makes removing the trim there nice and easy. Remove the trim from around the wing mirror level, all the way back to the B Pillar, as we’ll want to remove the carpet cover in this area too.
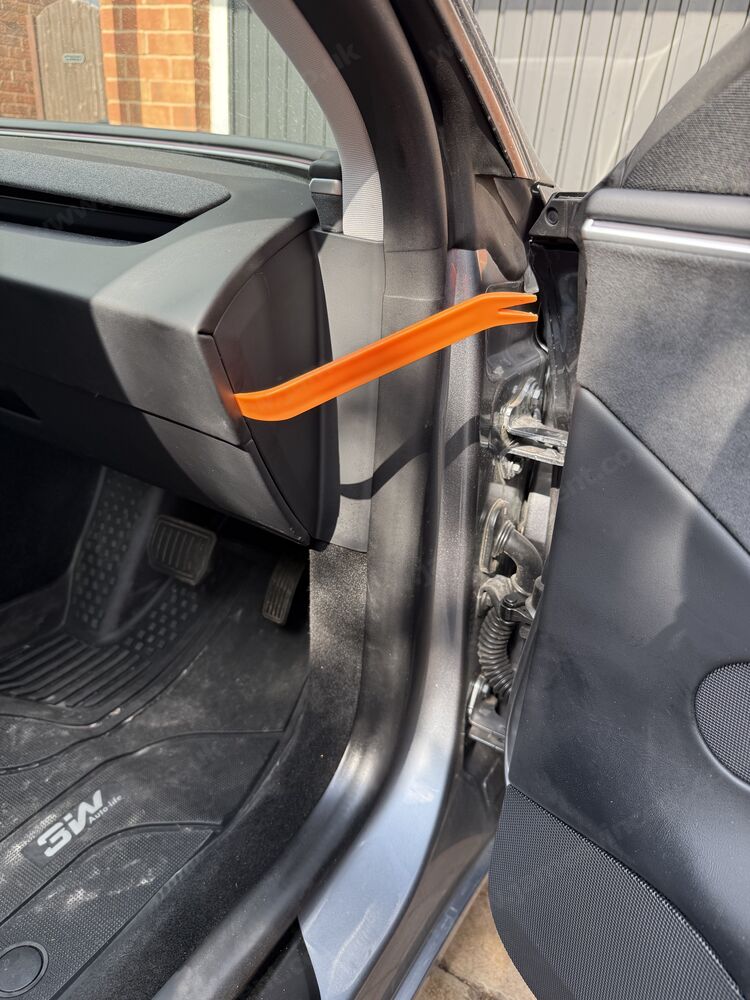
The carpet is held in by a plastic pop-clip. Wedging your flathead into this and levering it up, should allow you to pull back on the white clip being held in by the pop-clip. The carpeted piece you’re grabbing on to now just wiggles and lifts up, held in using spring clips.
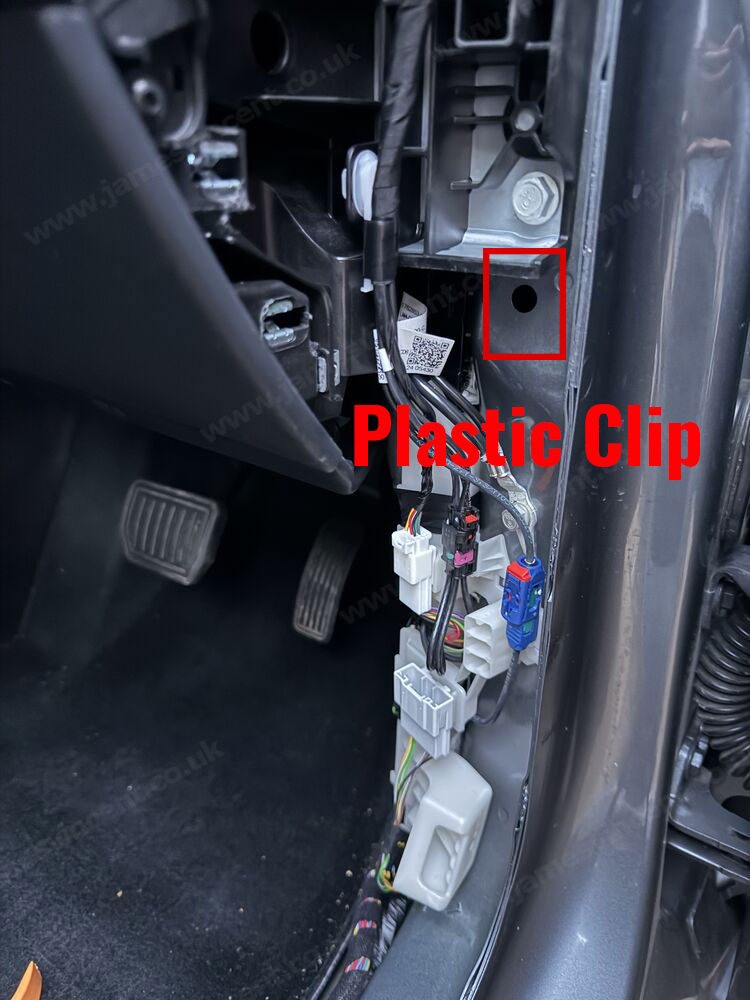
With the trim and carpet out of the way, you should see the power and data connections.
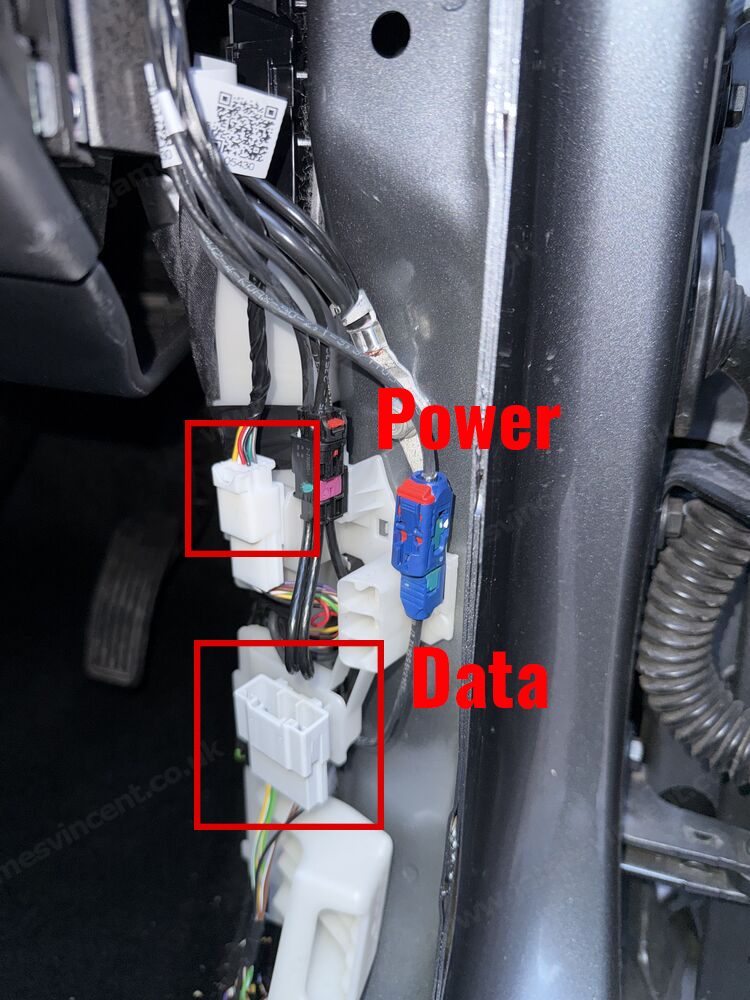
Now the fun begins.
Go fish!
The fishing line that comes with the kit, in my opinion is way too short. It’s like 30-45cm long. In the end I grabbed some spare wire around 1m long, and just used that to make my life easier.
Thread this down the steering wheel column, recommendation is to thread it down the upper right of the column. You might meet some resistance, but its just a case of finding the right gap and angle. You’ll be pulling a cable up with two connectors, with a width of about 1cm in total, so you need to find the right route.
The line will end up down at knee level although you likely won’t see it – yet. There’s a kick panel under the steering wheel which you can remove. This has a sneaky T20 bit holding it in, as well as clips. Whilst you could get away with just poking your fingers through, do yourself a favour and undo the T20 bit and drop the panel down. It’ll make finding the fishing line easier and allow you better access to route the cabling.
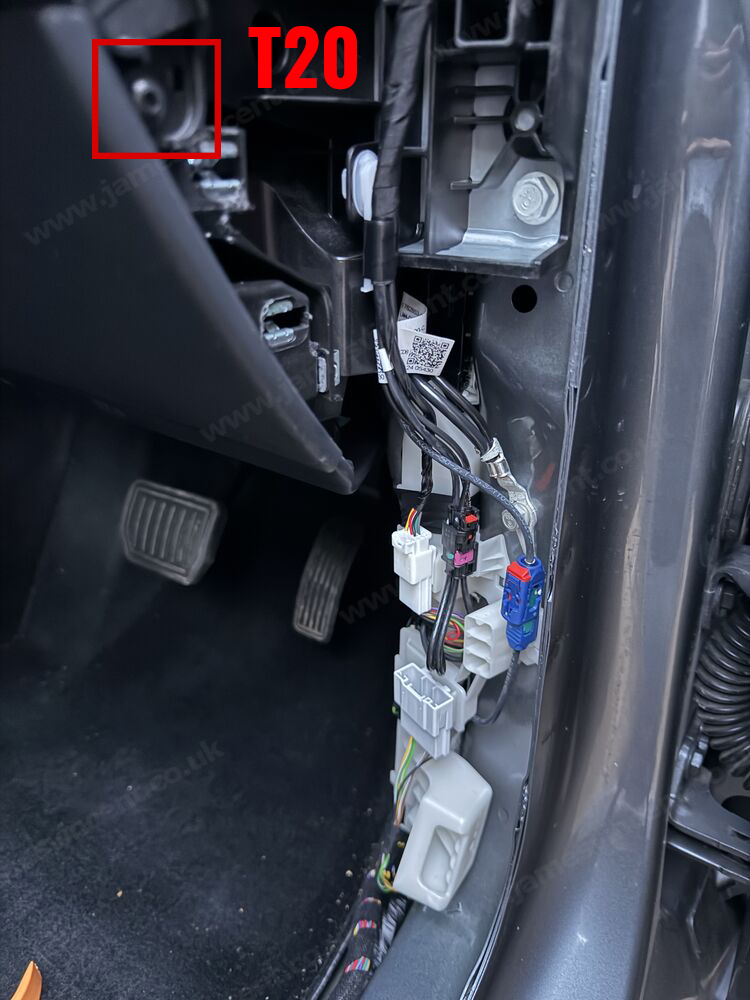
The wiring that ships with the stalks will have daisy chain connectors, you simply disconnect the connected cabling, insert them into the supplied wiring and go about your day. It’s best to refer to the actual instructions for this part. It’s not tricky to do, just tricky to explain. With all the connections made, tidy up the cabling, and we can look to reassemble the trim and put the carpet back etc…
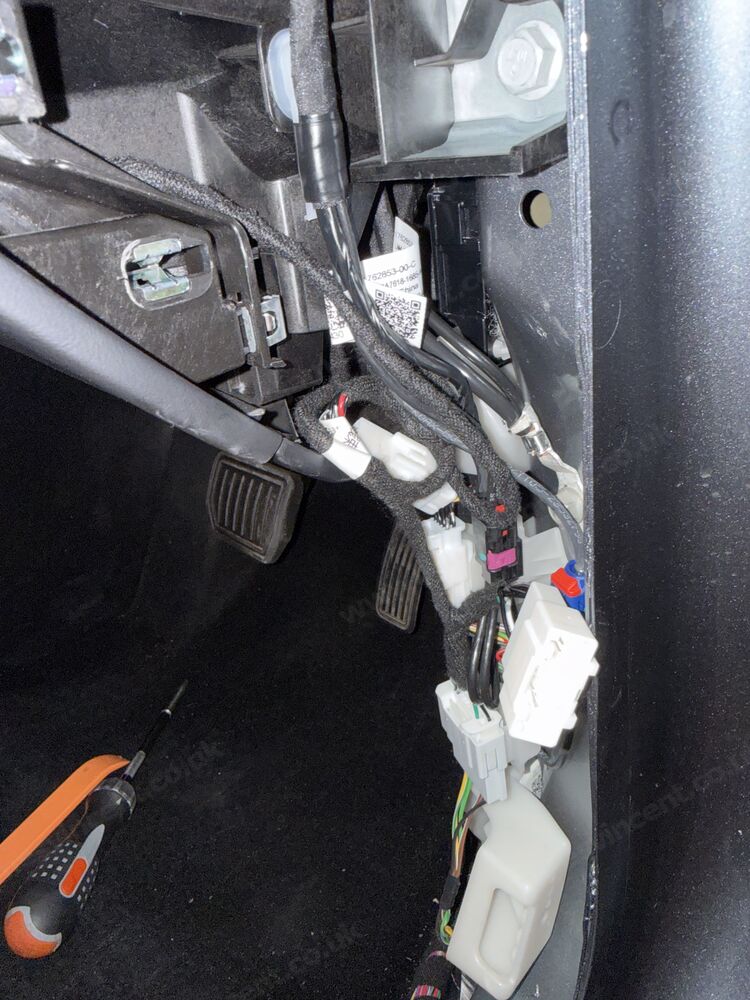
With the wiring run, we’re now ready to install the stalks.
Stalk installation
Grab the stalks from the box. I went with the indicator first. This just hugs the wheel hub, and lines up with one of the T20 we removed earlier in the process. Put the T20 back in loosely.
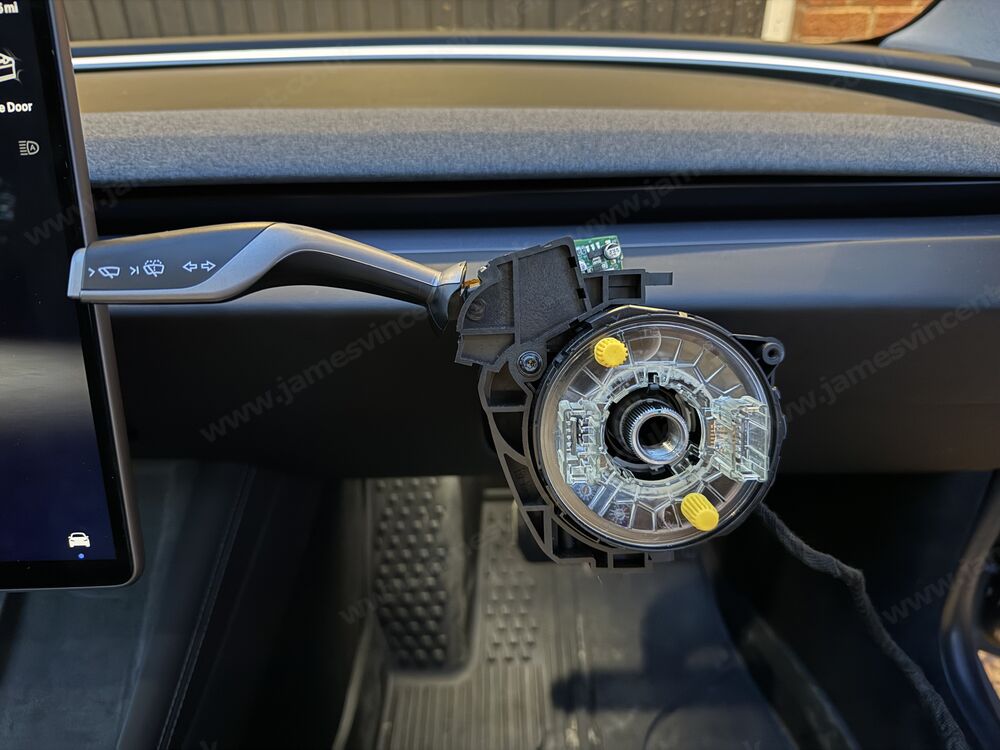
Line up the gear stalk, and drop in the T20. These two pieces will interlock around the hub and there are a few screws which came with the stalks that you can use to nip them together. One goes directly in at 12 o clock, and one at 6 o clock. There are holes at 5 and 7 o clock but these hold the shroud on, so ignore those for now.
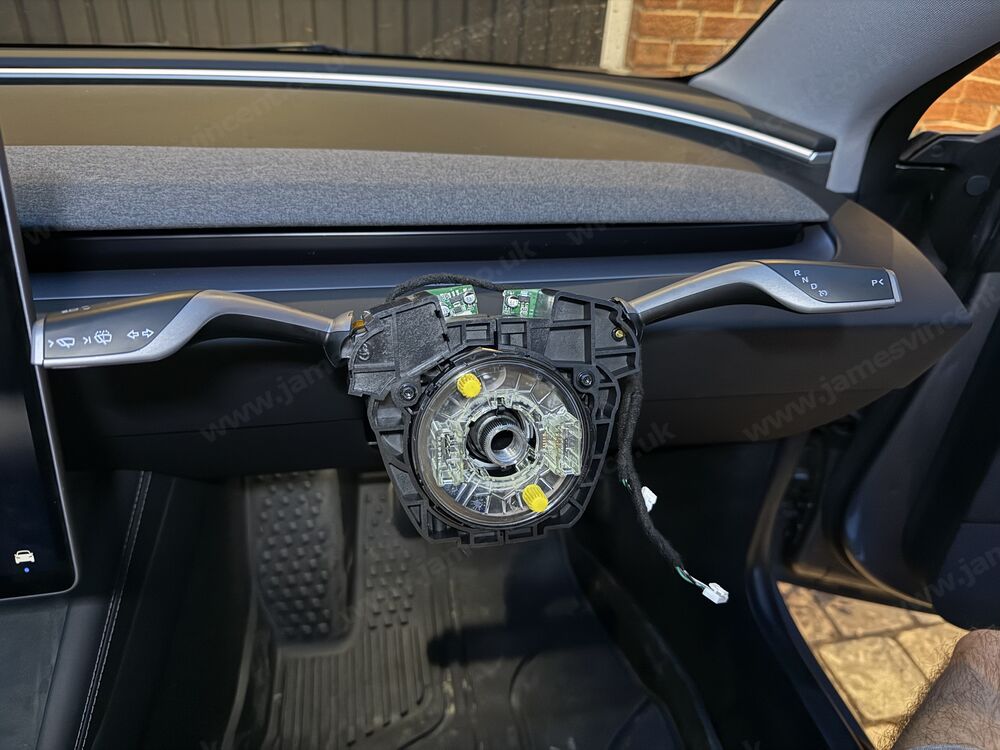
Next up, tighten the T20 and screws and connect the wiring. At this stage, it’s unclear to me, whether the wiring is different. I took a guess and put one into the indicator side, and the other into the gear side. Either I got the ends the right way round via luck, or it’s irrelevant – but you might want to perform a test after hooking up the wiring to see that your indicators are working.
When you’re happy, start to position the shrouding. Bottom first, screw it in tight and then slide on the top mount. I should add, that when I first tried this, my top cover went on at a really slight angle, which made things tricky. It does seem to be built to precision, so ensure you’re sliding both sides of the top shroud down in precise movements at an equal angle. It should clip in, and once clipped in, I’m not confident it’ll unclip without becoming cracked and obliterated. My faith in the plastic used isn’t as strong as that used by Tesla.
Note! See the observation at the very bottom of this article before putting everything back!
Give the stalks one last test, and we’re ready to hook the wheel back up.
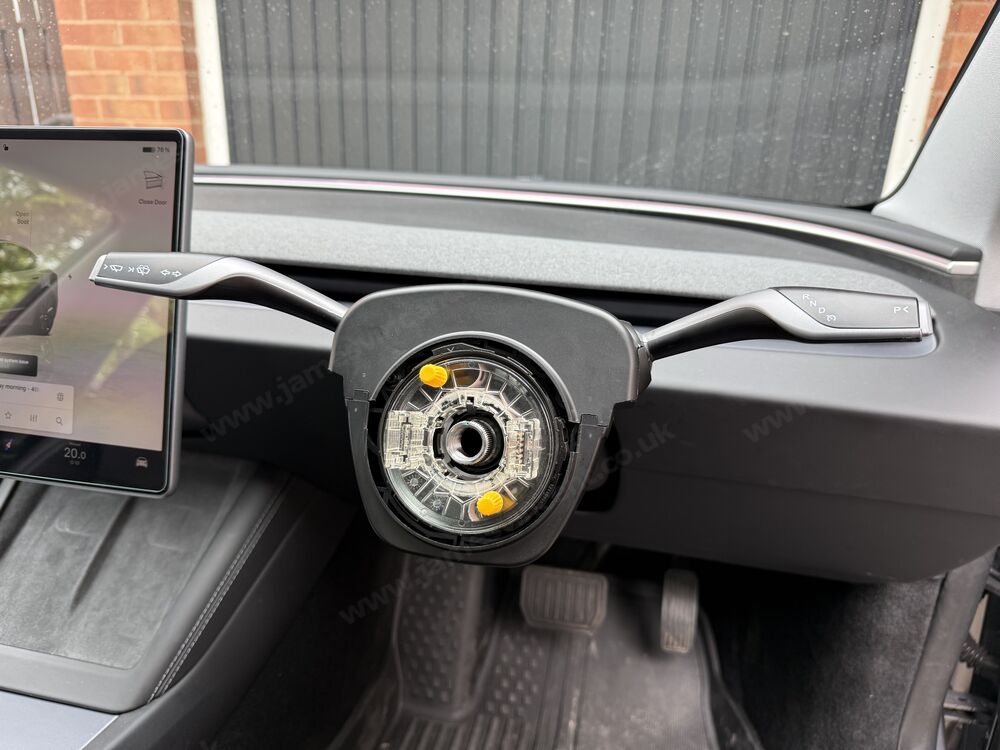
Reinstall the wheel
Reinstall the steering wheel by lining it up on the spline correctly. Remember I mentioned some alignment marks, these will help you here. Get the wheel fully on, and then screw in the 10mm Hex bolt.
Ensure the car remains powered down, and reinstall the Airbag, gently, and connect the 2x wiring connections. If you can reinstall the airbag without sounding the horn, i’ll give you all the credit in the world.
And there you have it. A pair of stalk(ers).
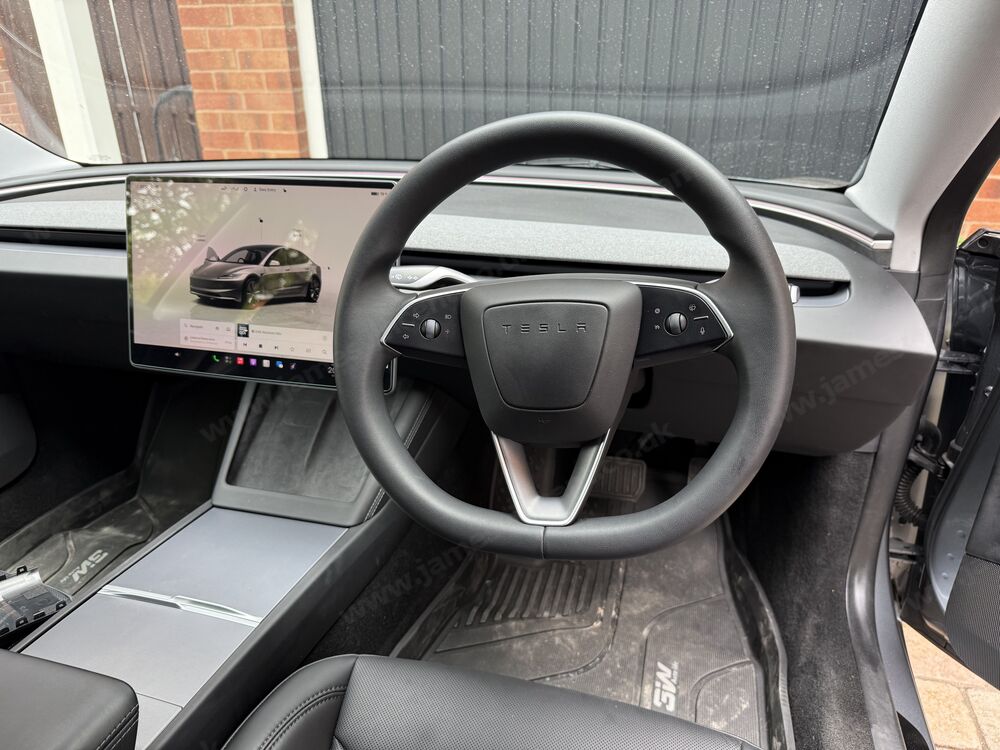
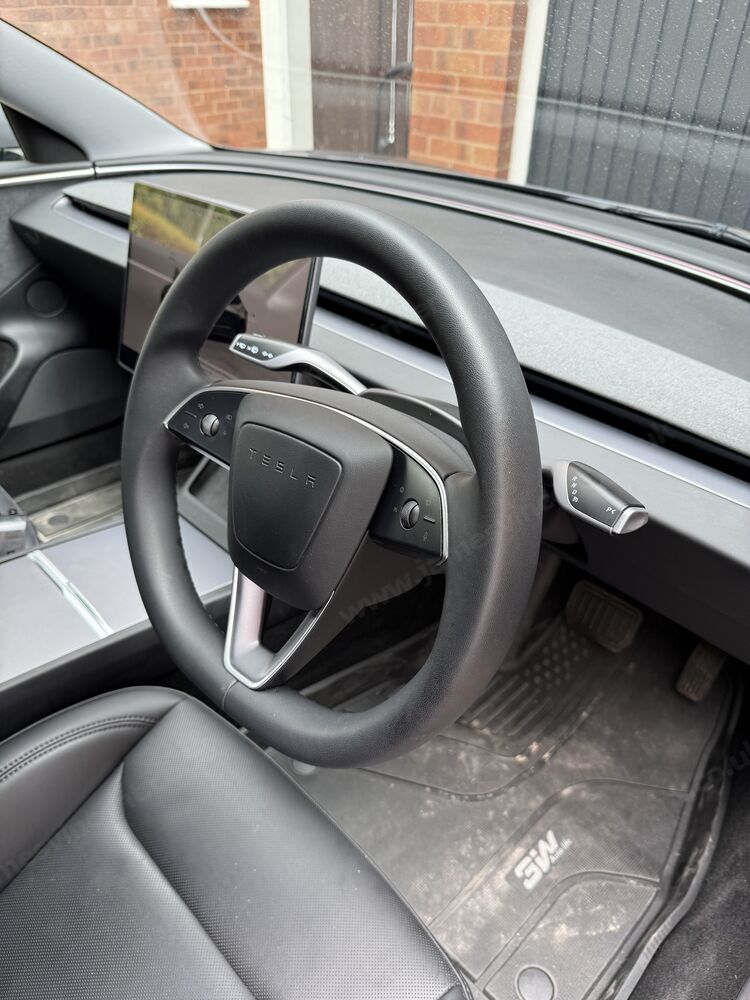
Observation
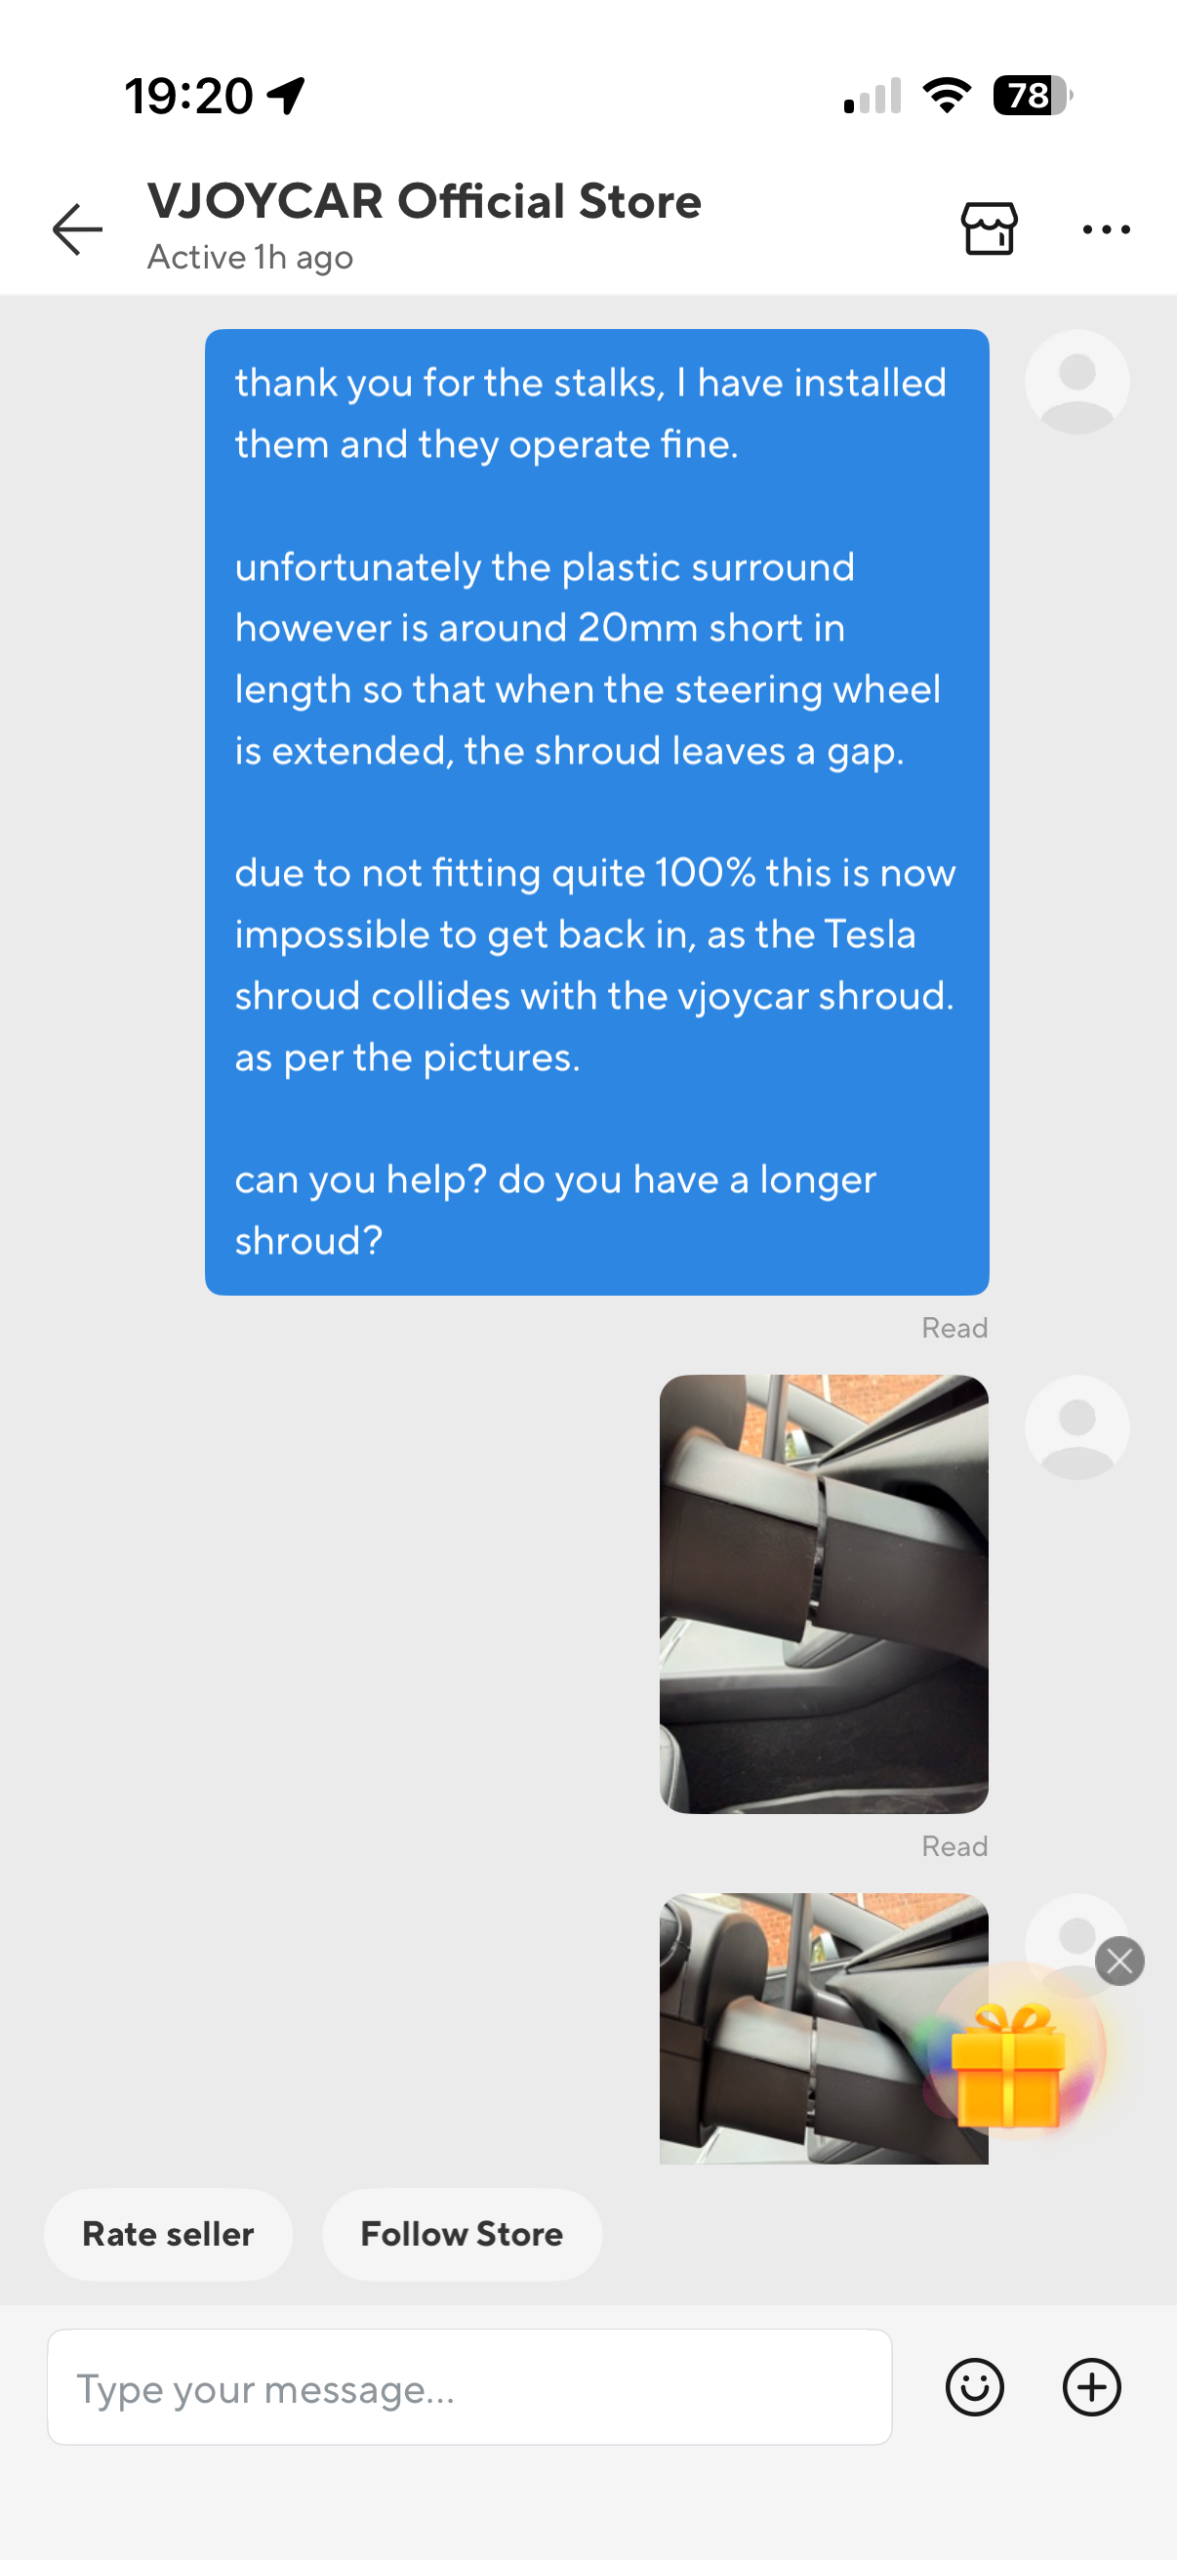
I should highlight at this point. A slight niggle. When I powered on the car, it started to load my profile, which included my seating and steering wheel position. Whilst doing this, I heard a swift, loud crack. Upon investigation, I found that the supplied shrouding isn’t really long enough to cover a fully extended Tesla wheel.
The crack was the plastic meeting each other as the wheel tried to reset to a less protruding position. No damage occurred this time around, but if you’re someone who drives with the wheel fully extended, then repeated extension could quite easily result in this plastic cracking.
This photo reveals a few things. The bottom shrouding has a sizeable gap. The top does not. This either means I’ve done something screwy during the install, or the angle of the shrouding supplied is very slightly off. On the basis there’s no play or no real way to bodge the installation, I’m assuming the angle is related to the product and not user.
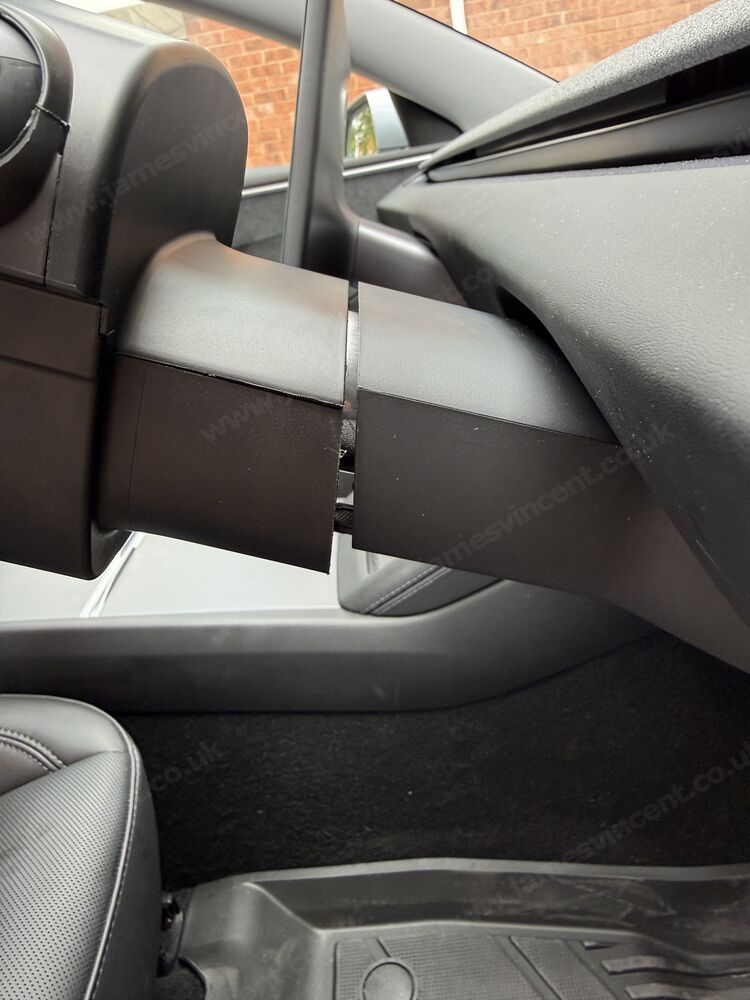
Angles and gaps aside, I personally feel that if the shrouding provided could benefit with being 20mm longer. This additional length would cover the gap shown here when on full extension, and would provide enough additional shroud to keep the extension within the VJOYCAR shrouding. It would also provide enough flexibility to get this seated correctly.
I have raised this with VJOYCAR. They state this has not been seen before, but….
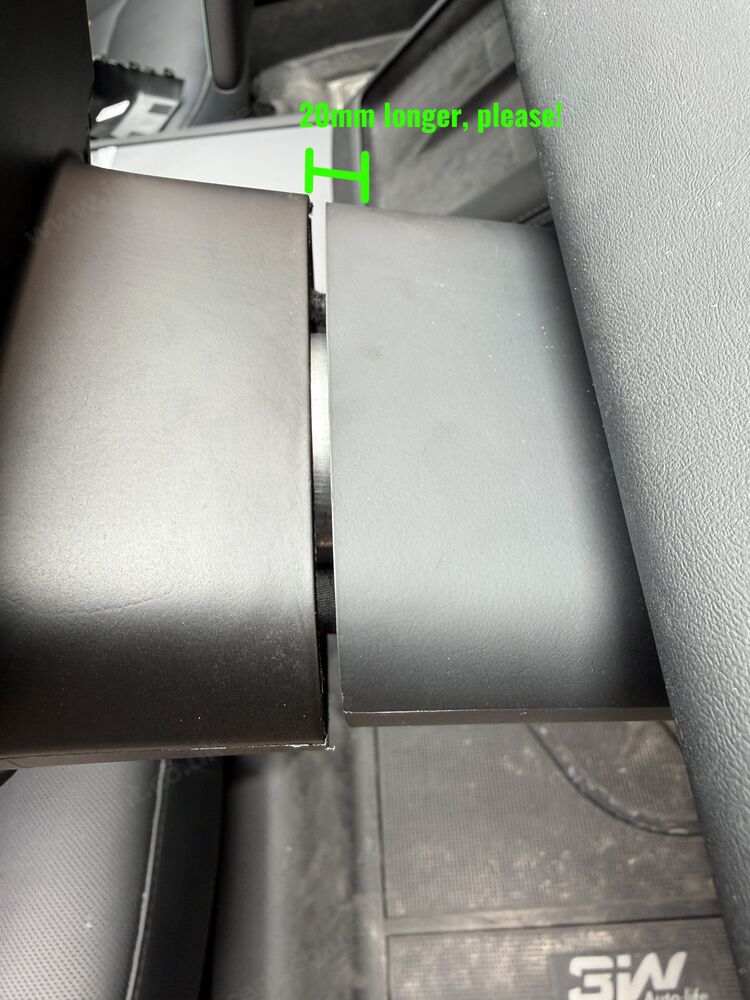
and the response…
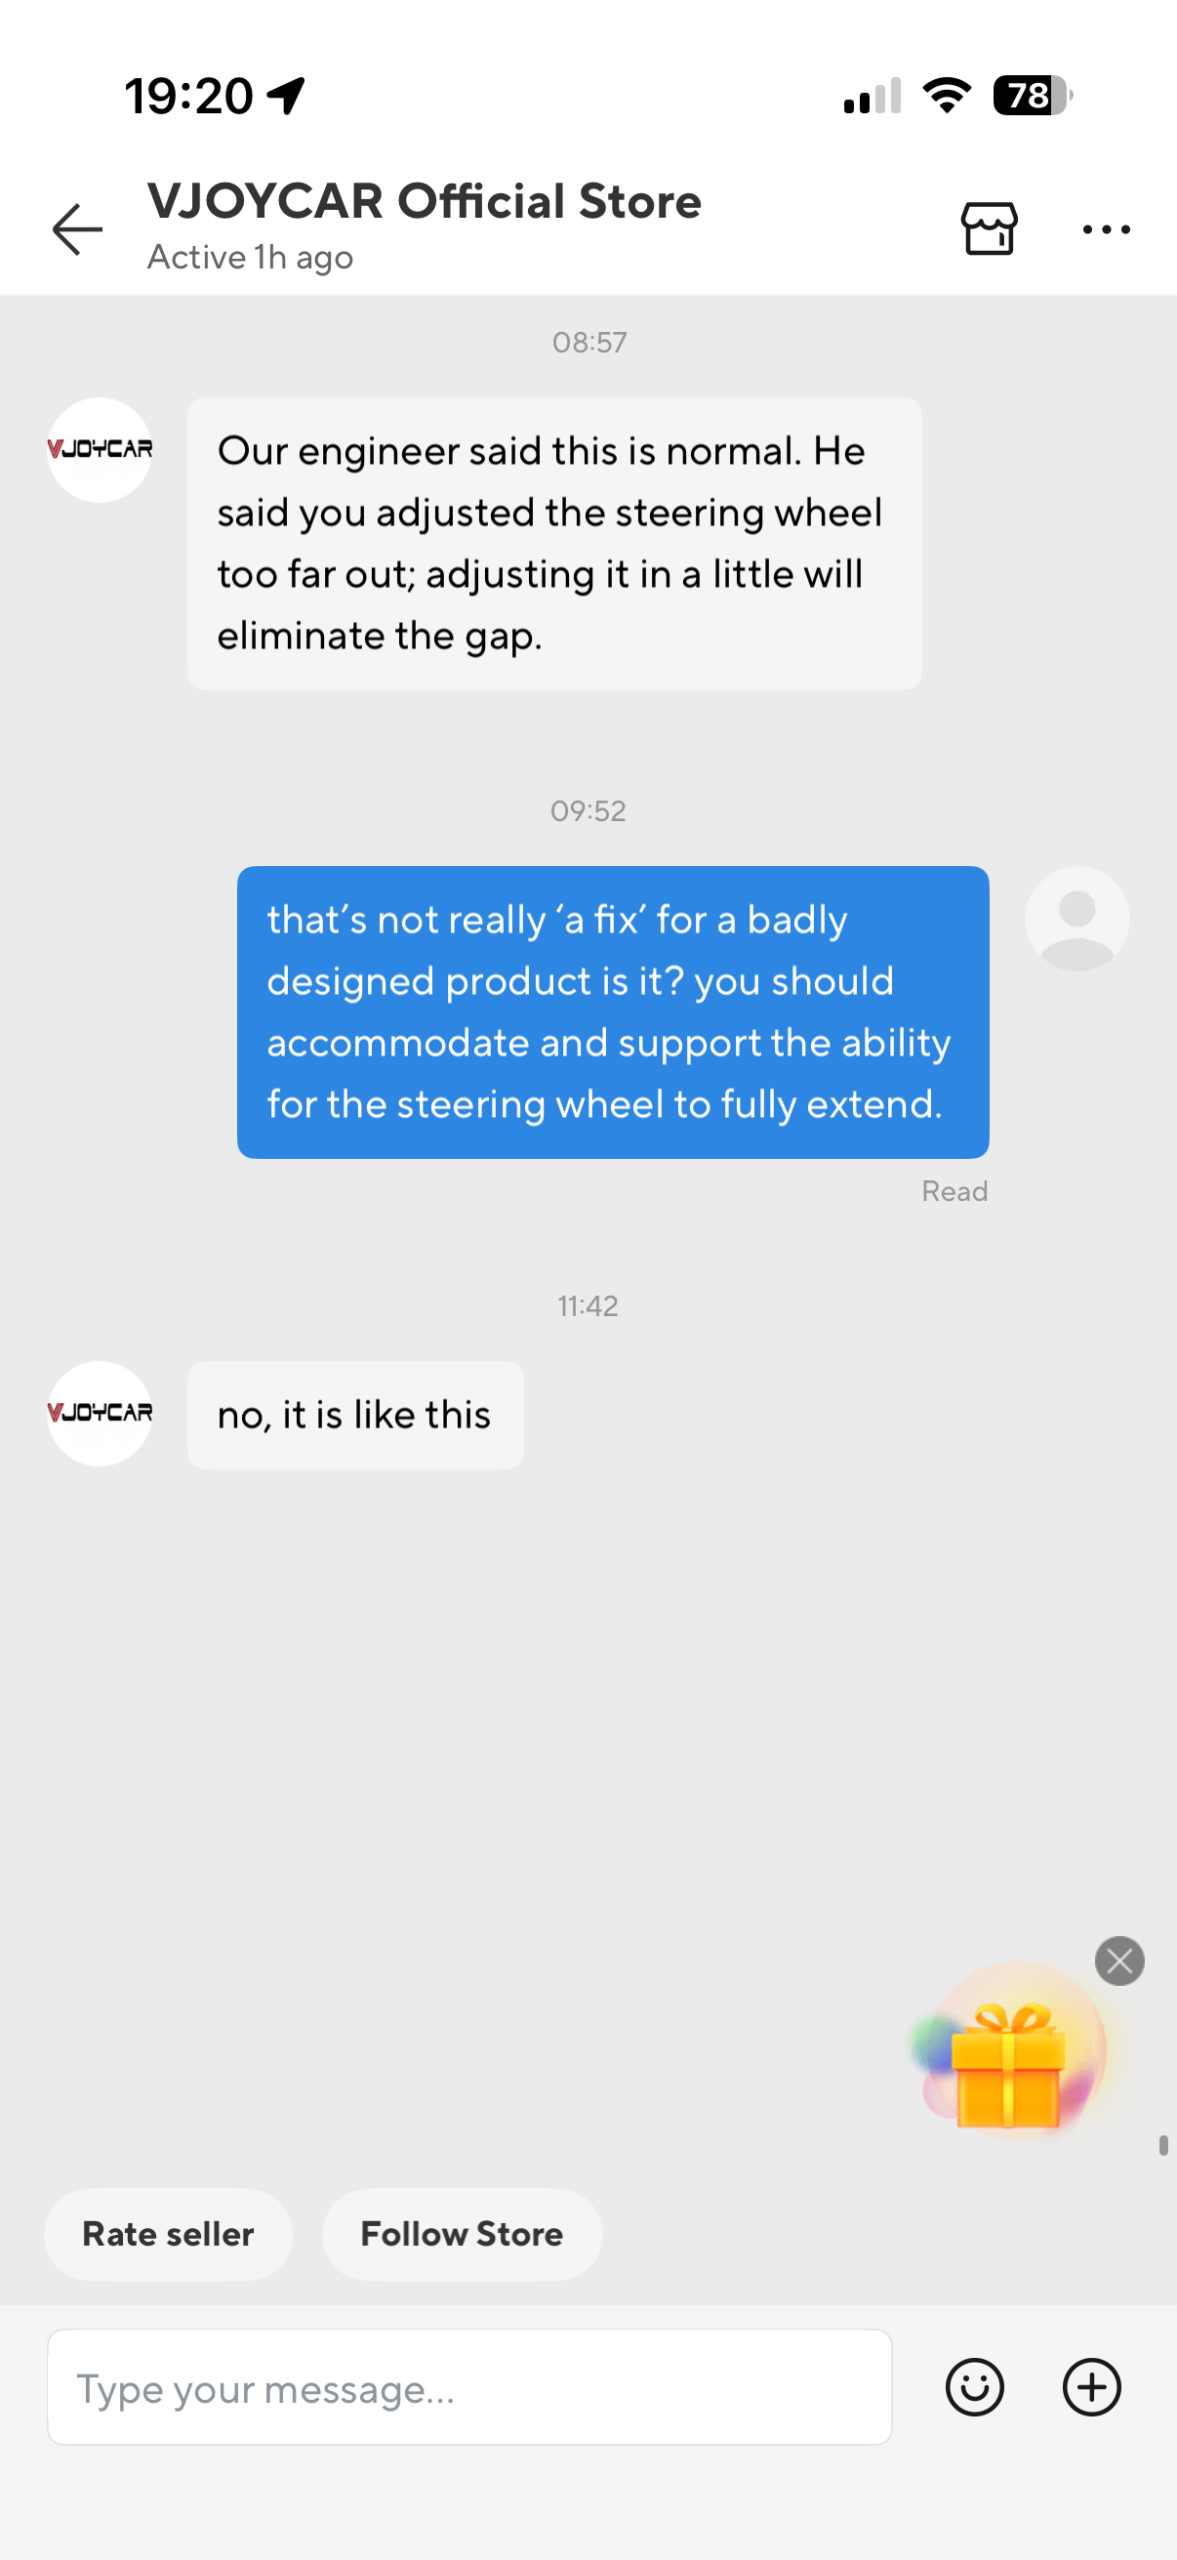
not really unexpected to be honest, and the suggestion does work. But you just know someone’s going to play, extend the wheel fully and cause you a mild 5-minute headache.
How well does it operate…
In all honesty, very well. All the functionality works. Which is what you want, right?
I do need to add however, that despite having the look of the official “legacy” Tesla stalks, you can tell they’re not actual Tesla stalks, but very close repro’s. They feel very light and somewhat flimsy especially the gear stalk. Annoyingly, the gear stalk also introduced a rattle into my car, which as a hater of all rattle-y things, really irked me. I think it’s the plastic “Park” button in the end of the stalk, that’s not quite snug and rattles about. Time will tell whether I do anything about it, but for now, I’ll just live and let live, and hopefully it wins “wife acceptance” and all is well.

Leave a Reply